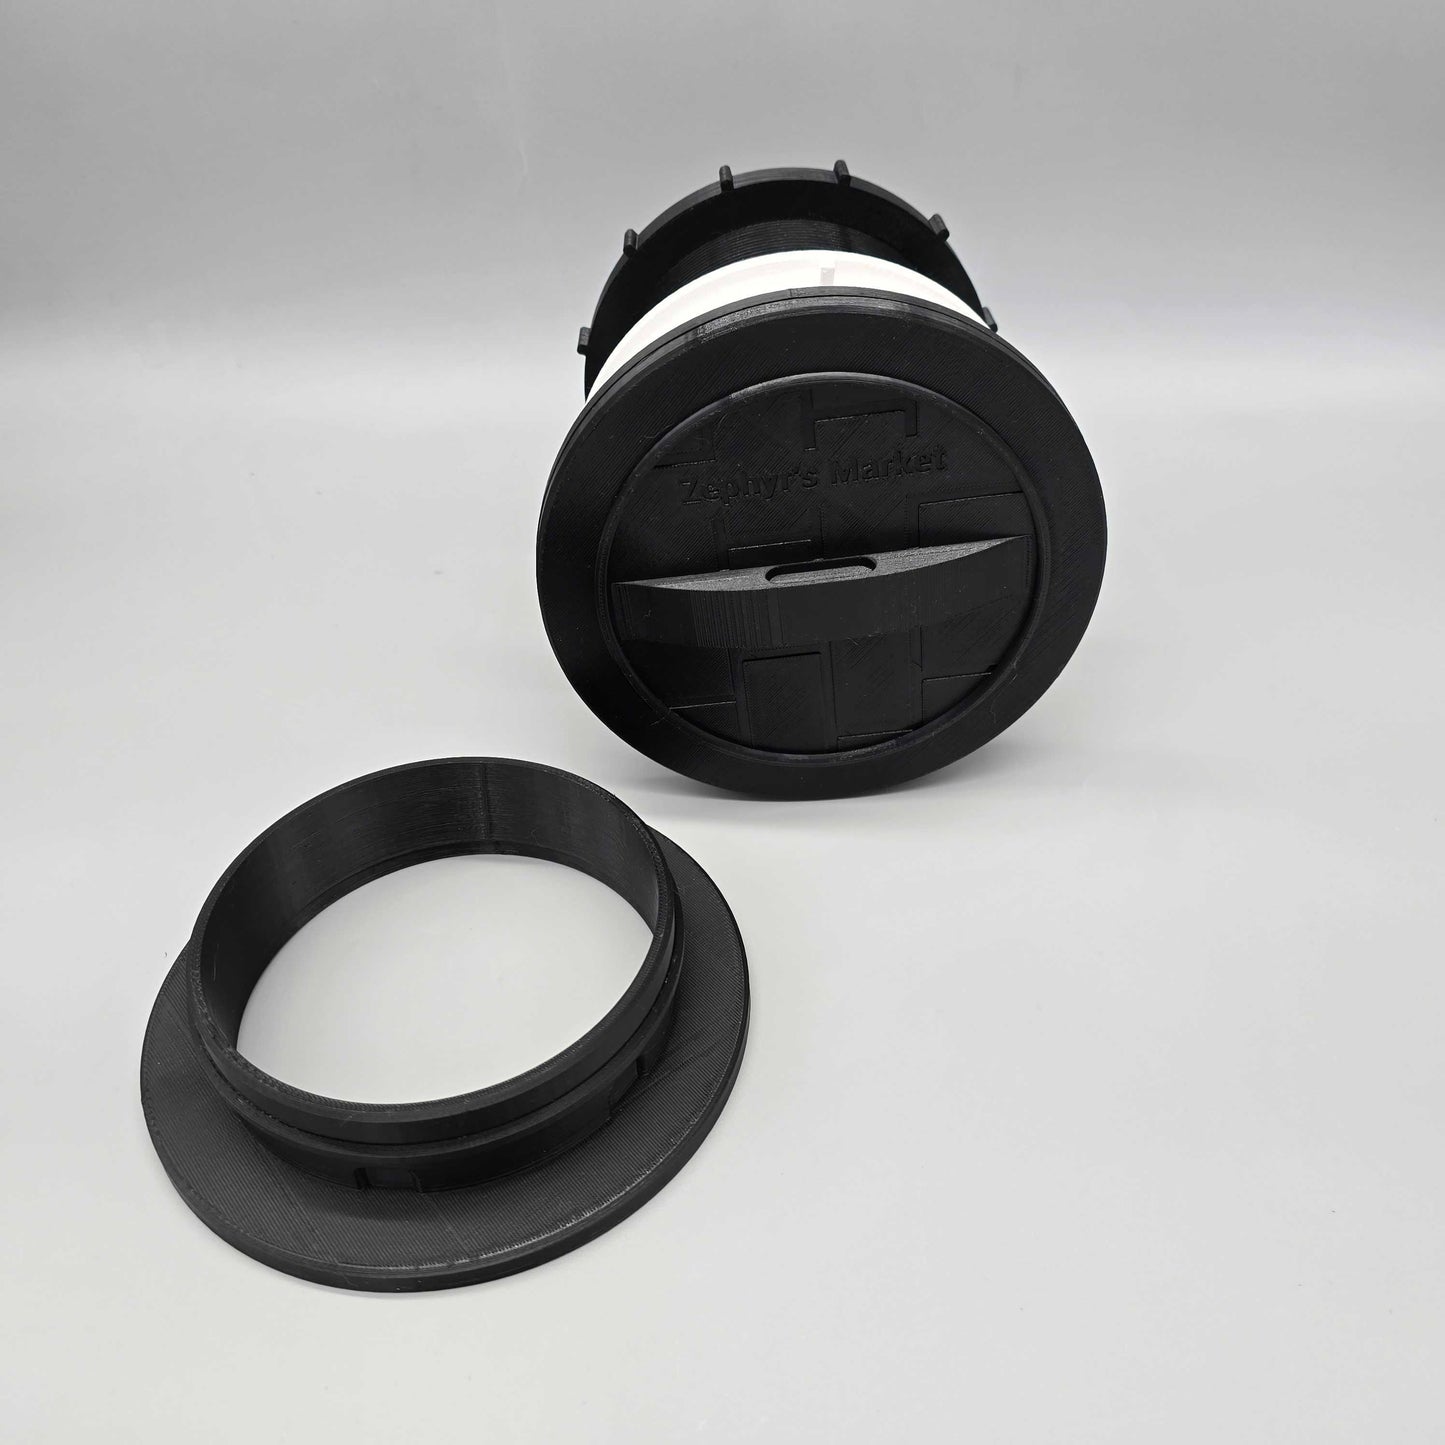
Magduct Portable Air Conditioner Vent Kit with Magnetic Tube Attachment - Through-Wall Solution for RVs & Homes (Fits 5" & 6" Ducting)
Revolutionize your portable air conditioner venting with our versatile, easy-to-install Through-Wall Vent Kit!
This innovative vent kit provides a seamless and efficient solution for bringing portable air conditioning to your houses, RVs, motorhomes, and fifth wheels. Designed for ultimate convenience, it eliminates the need for complex installations, offering a robust and aesthetically pleasing way to vent your portable AC unit.
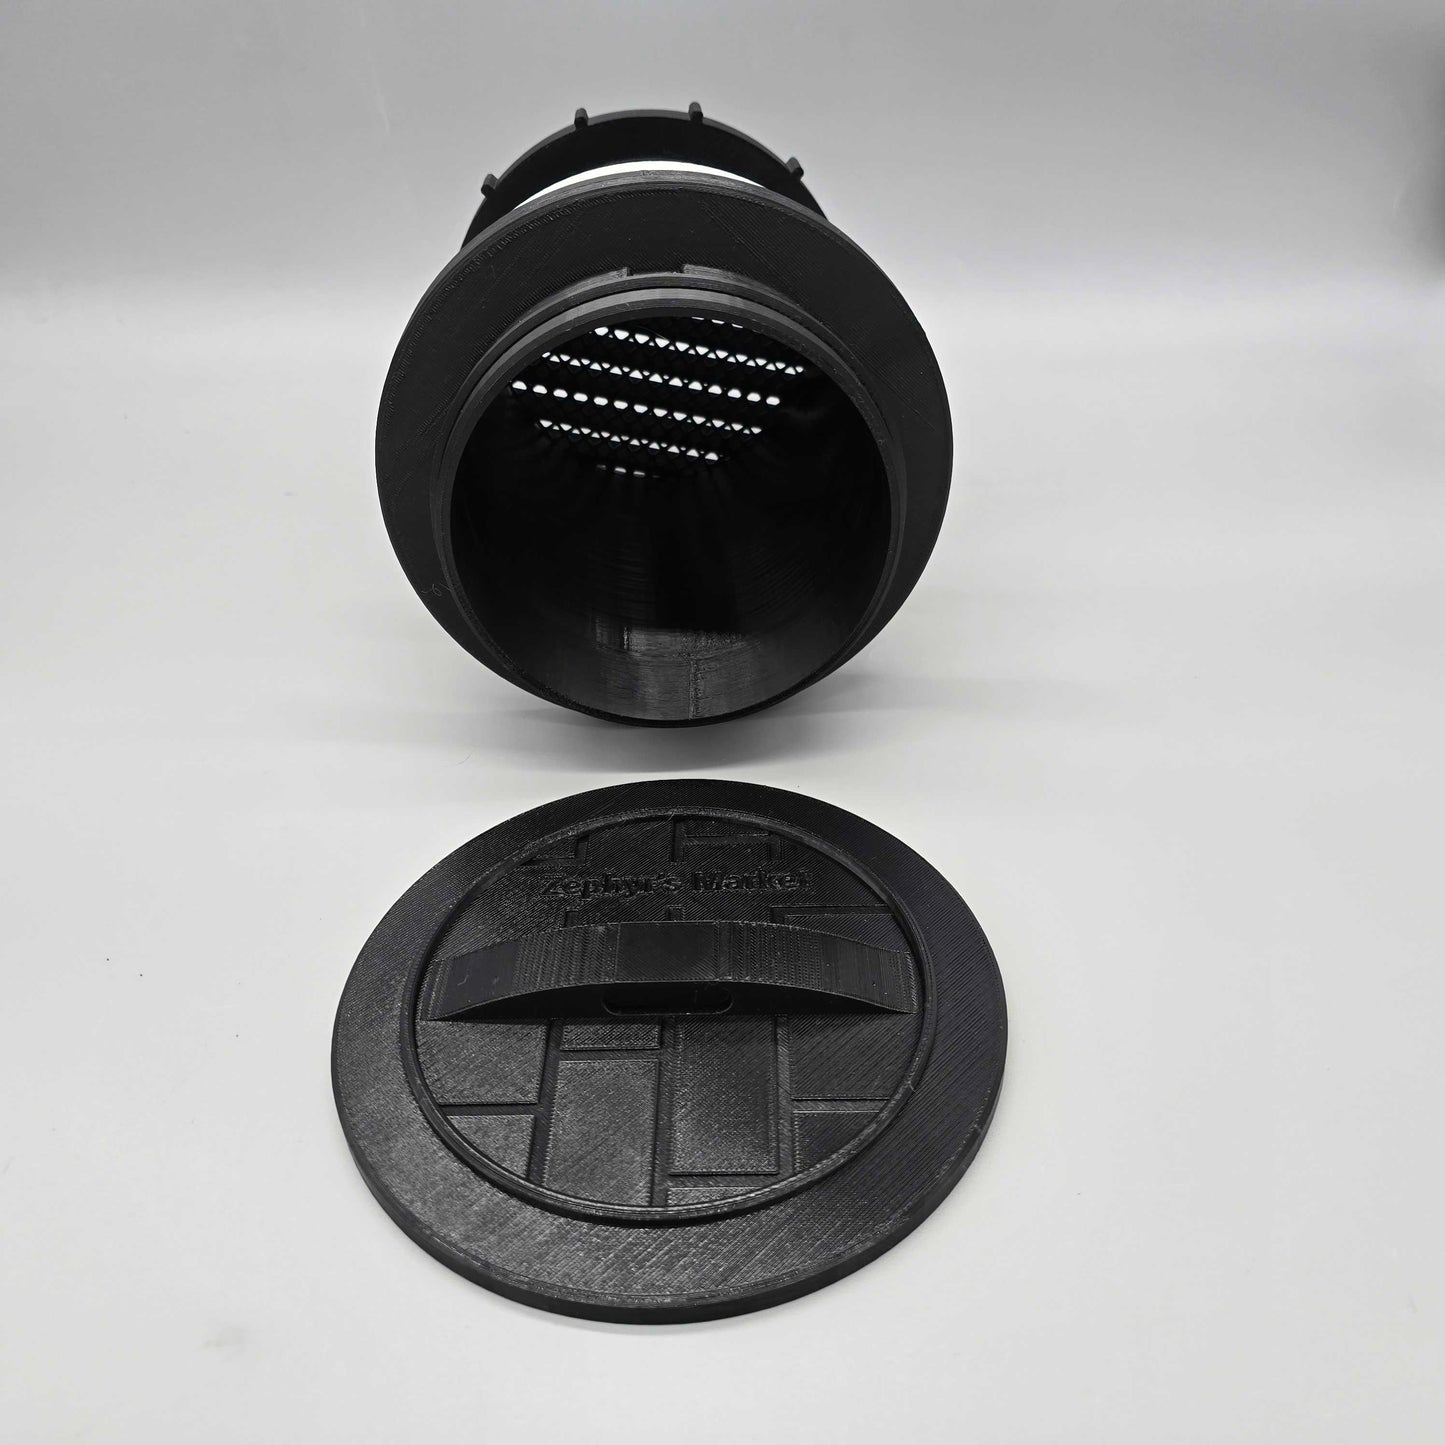
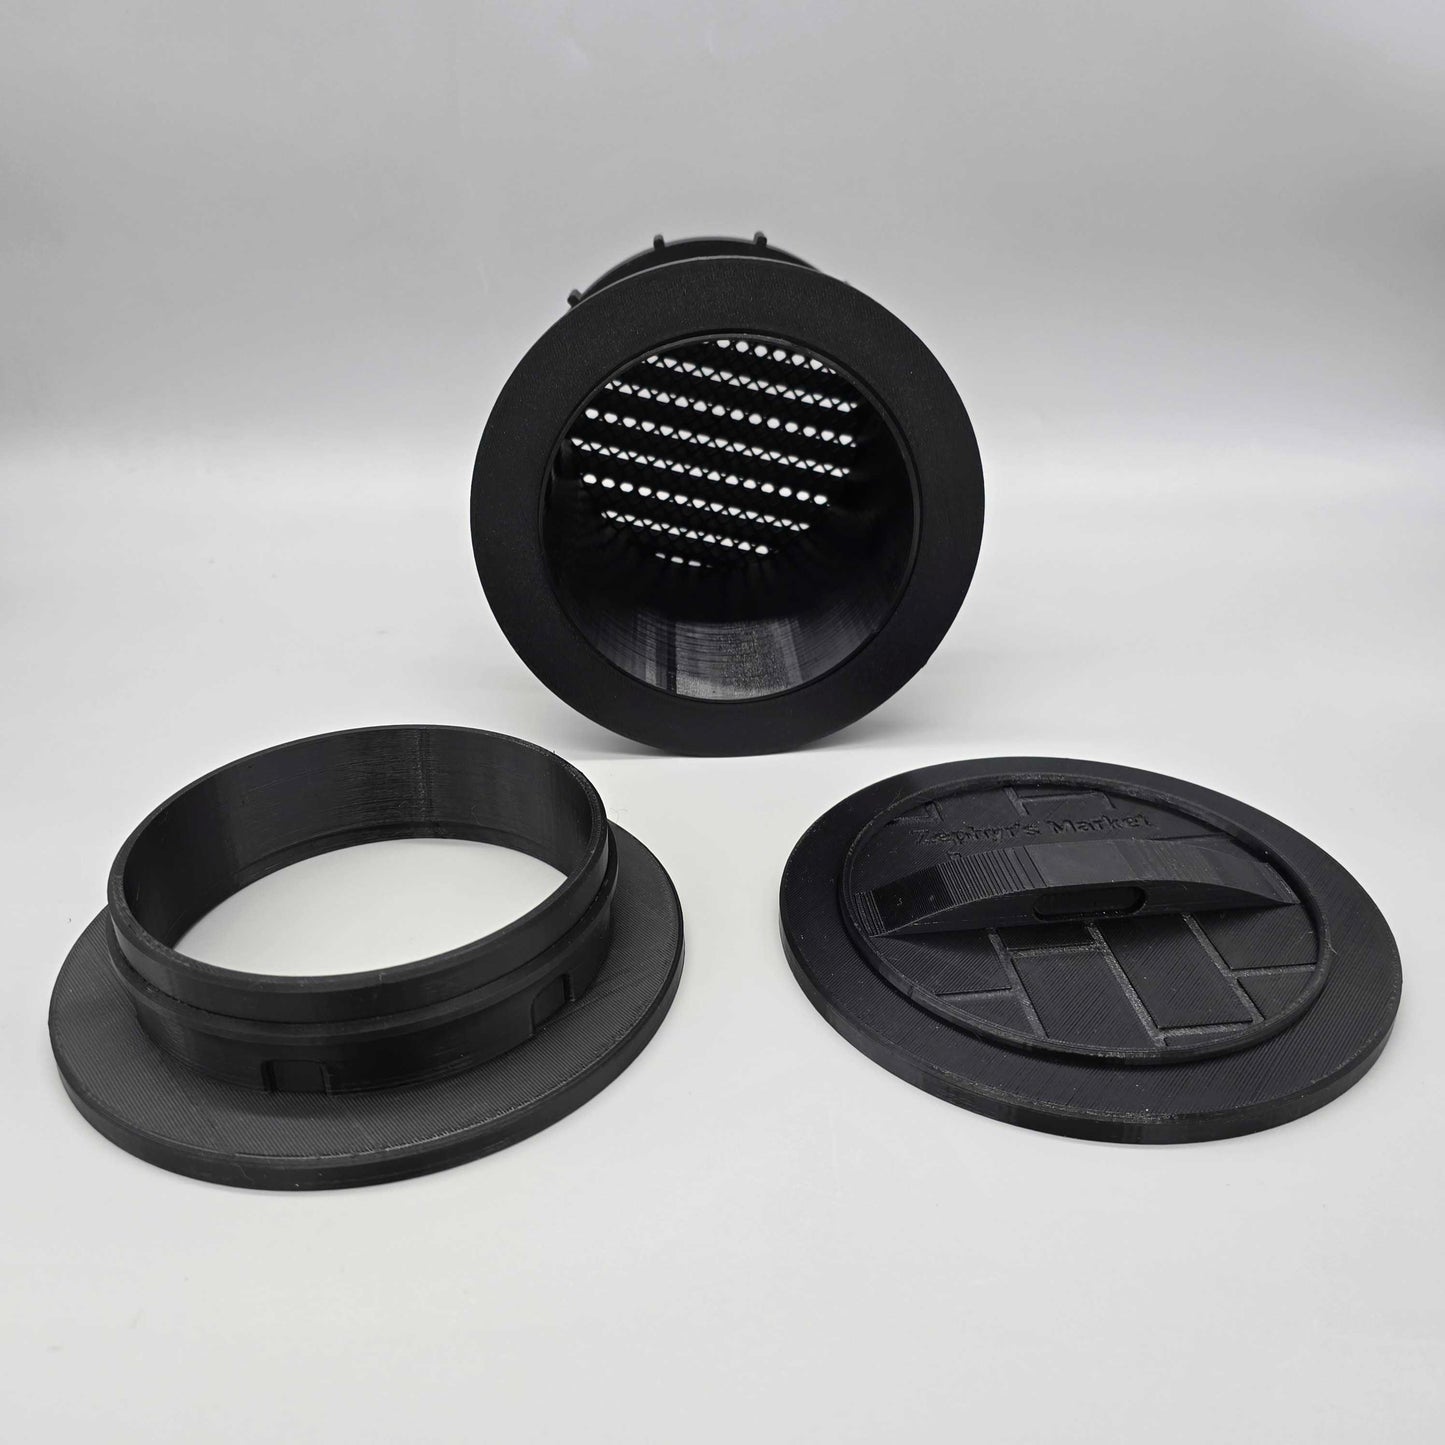
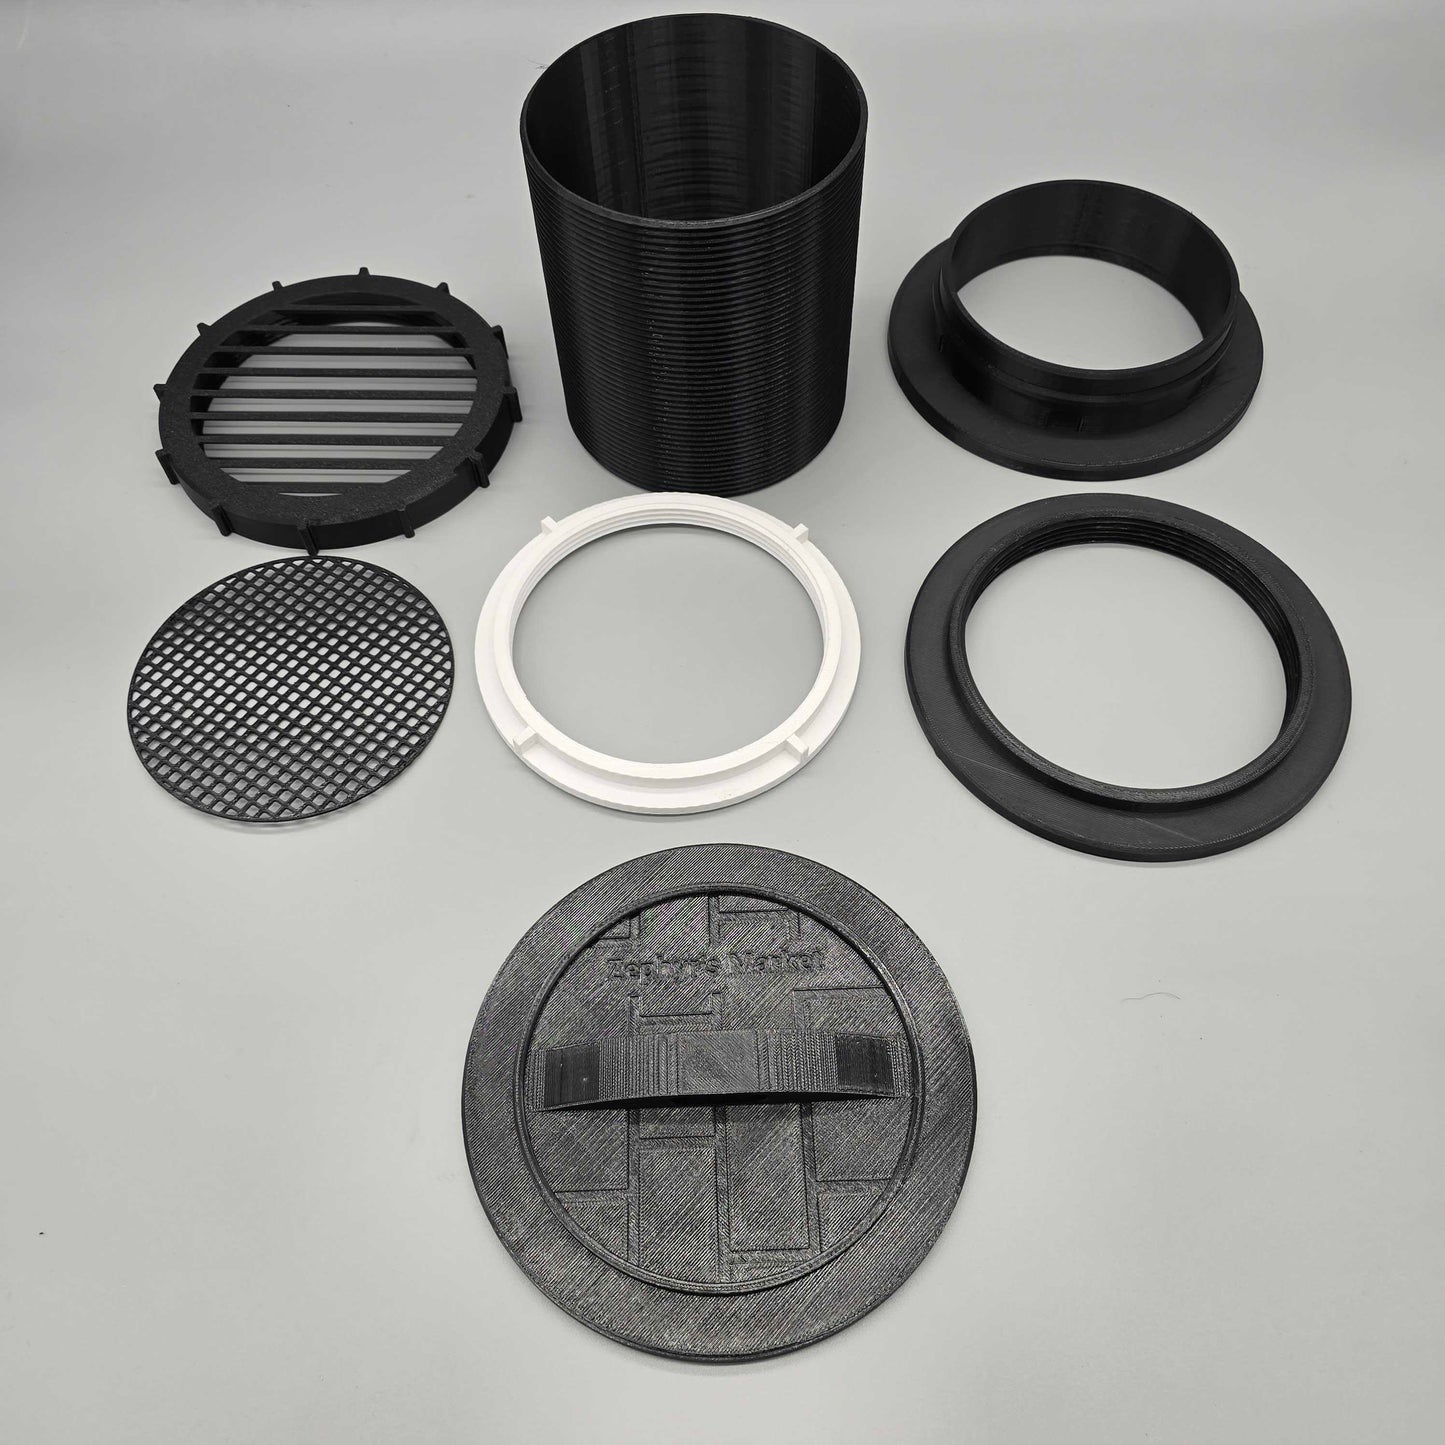
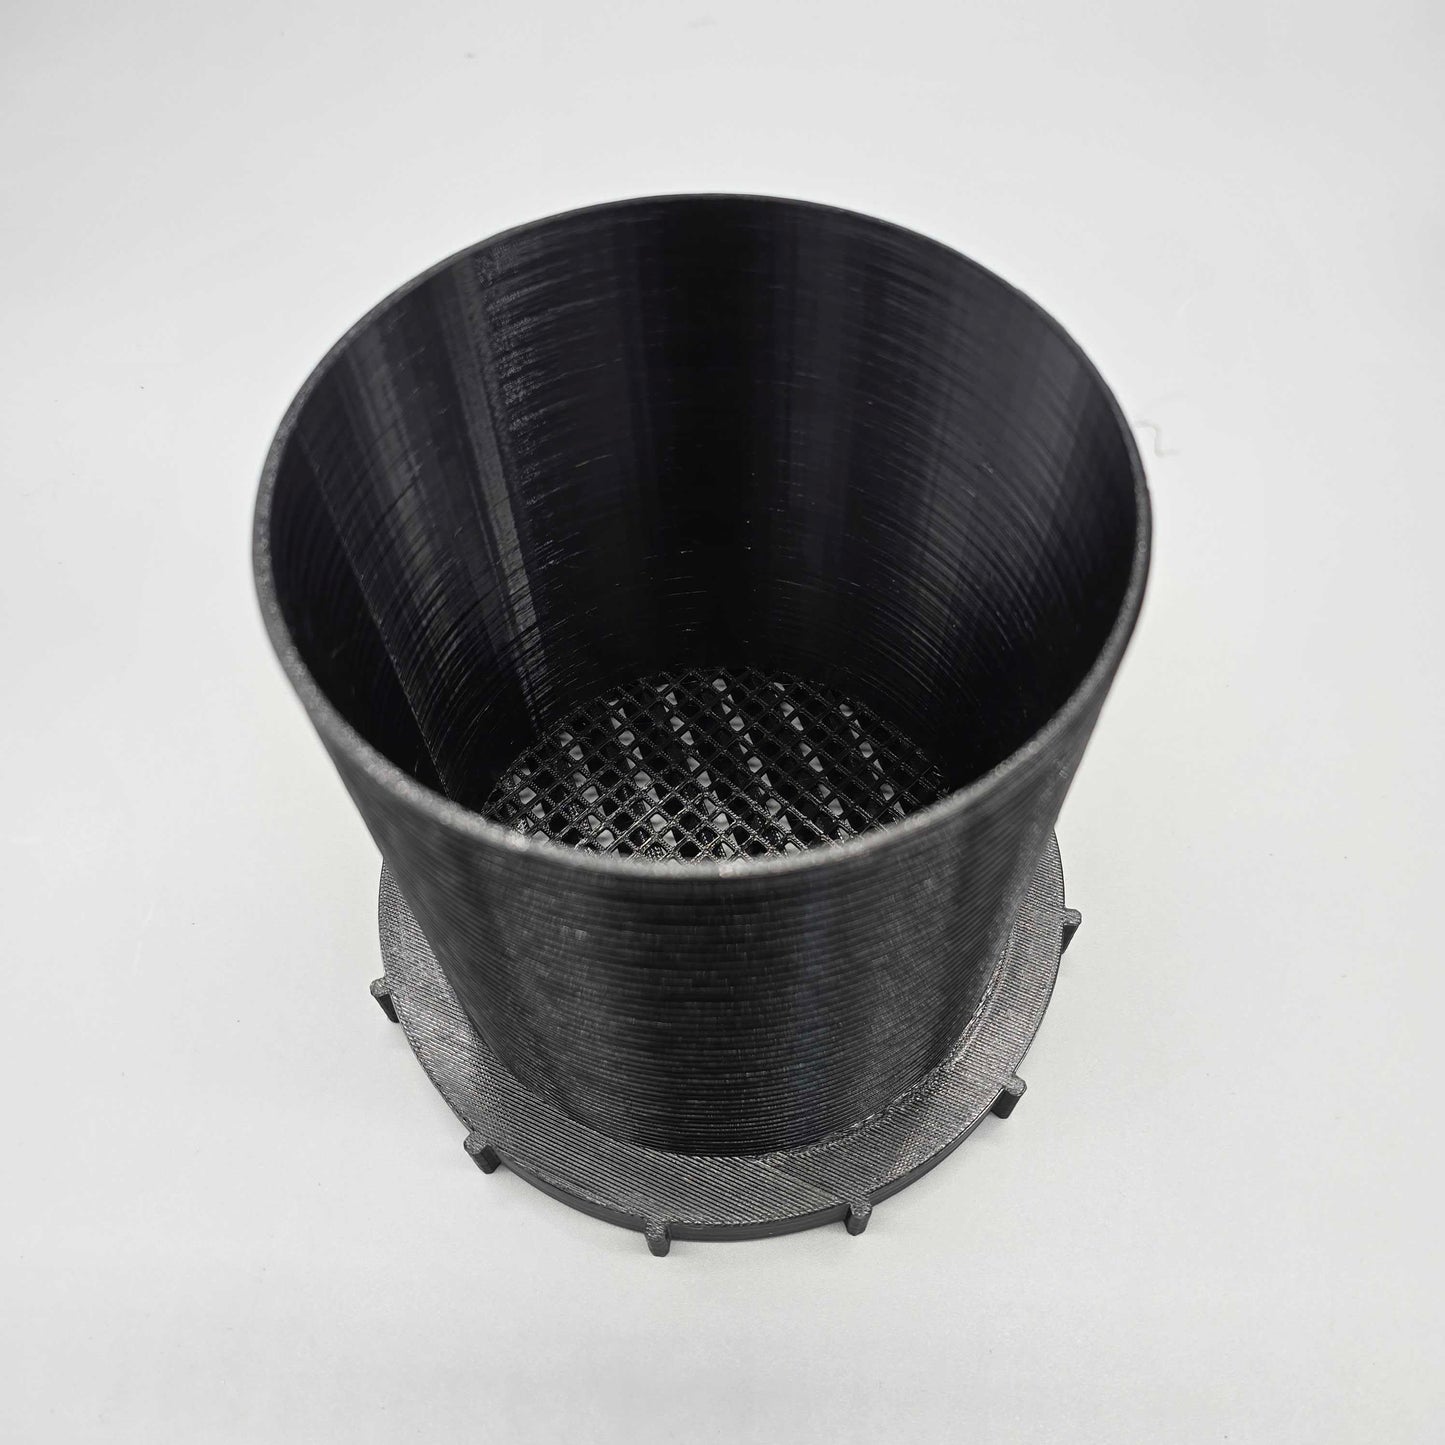
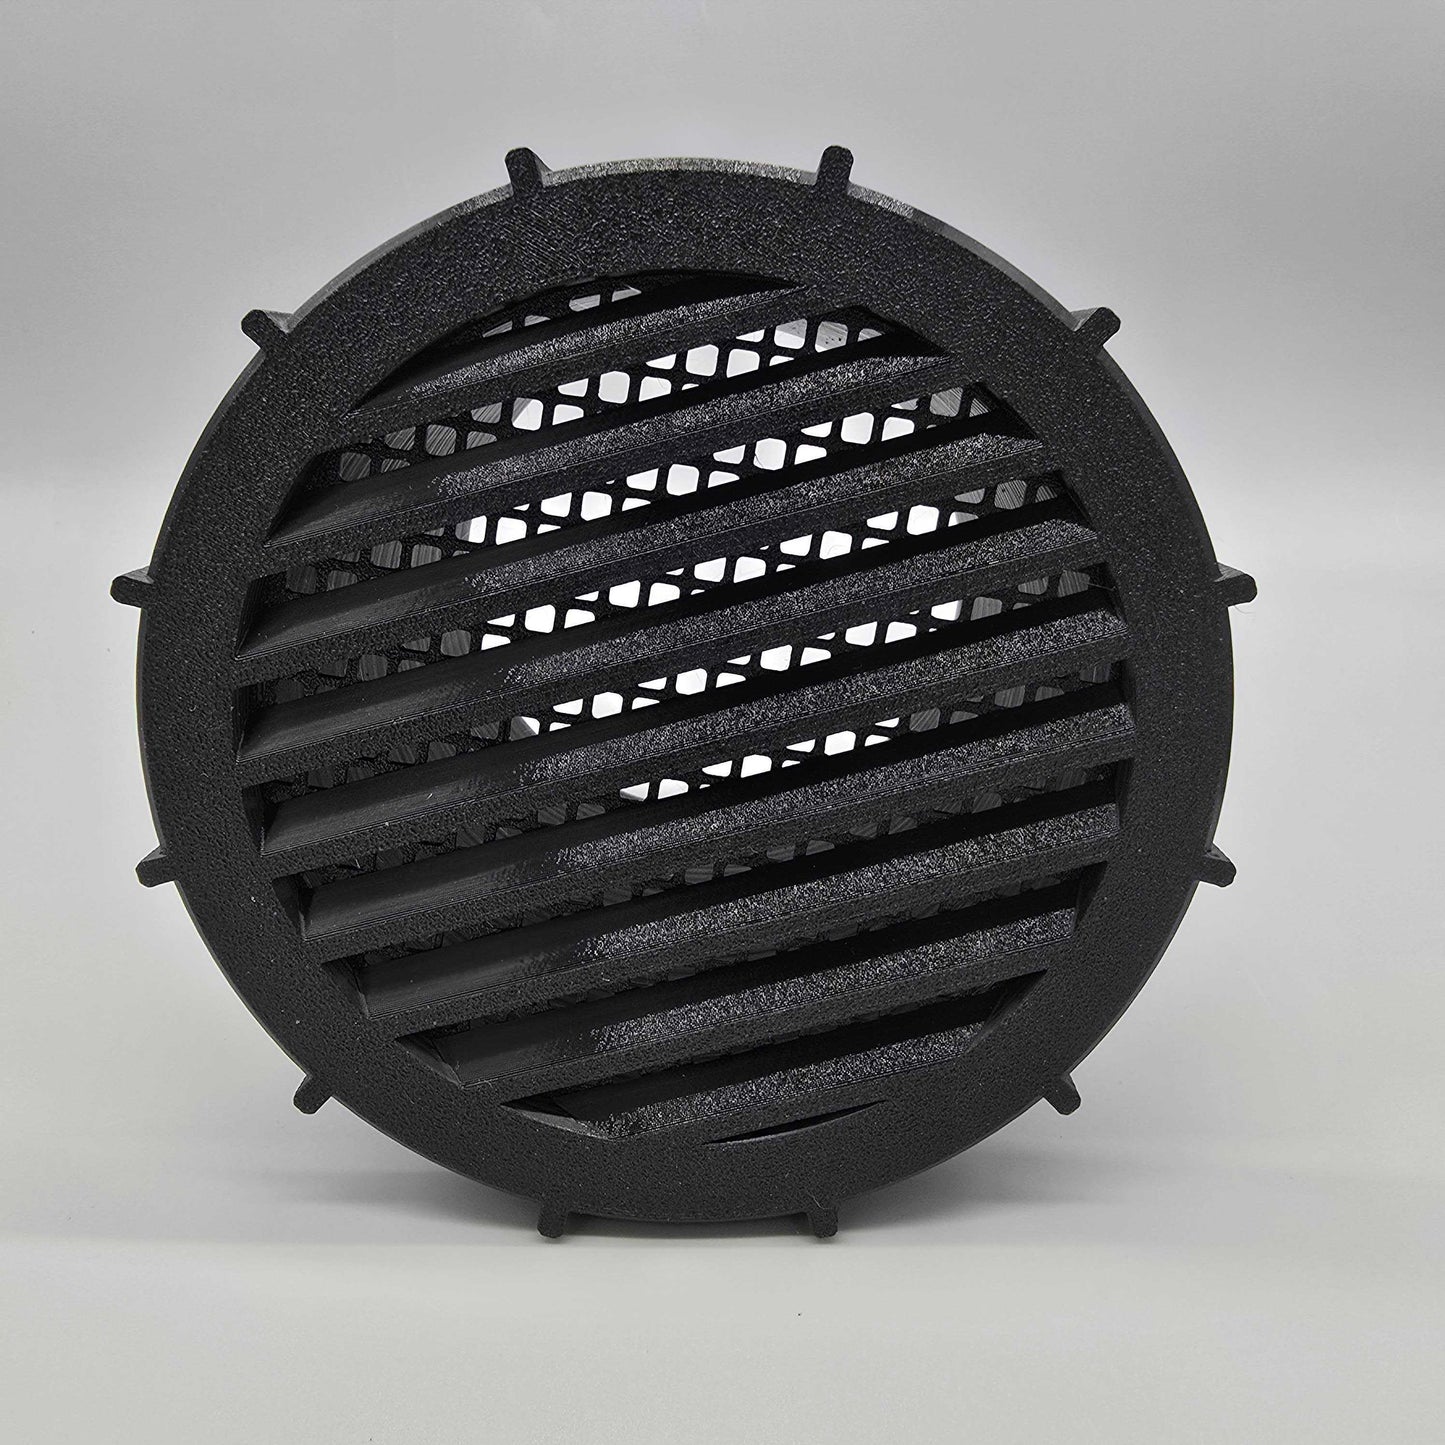
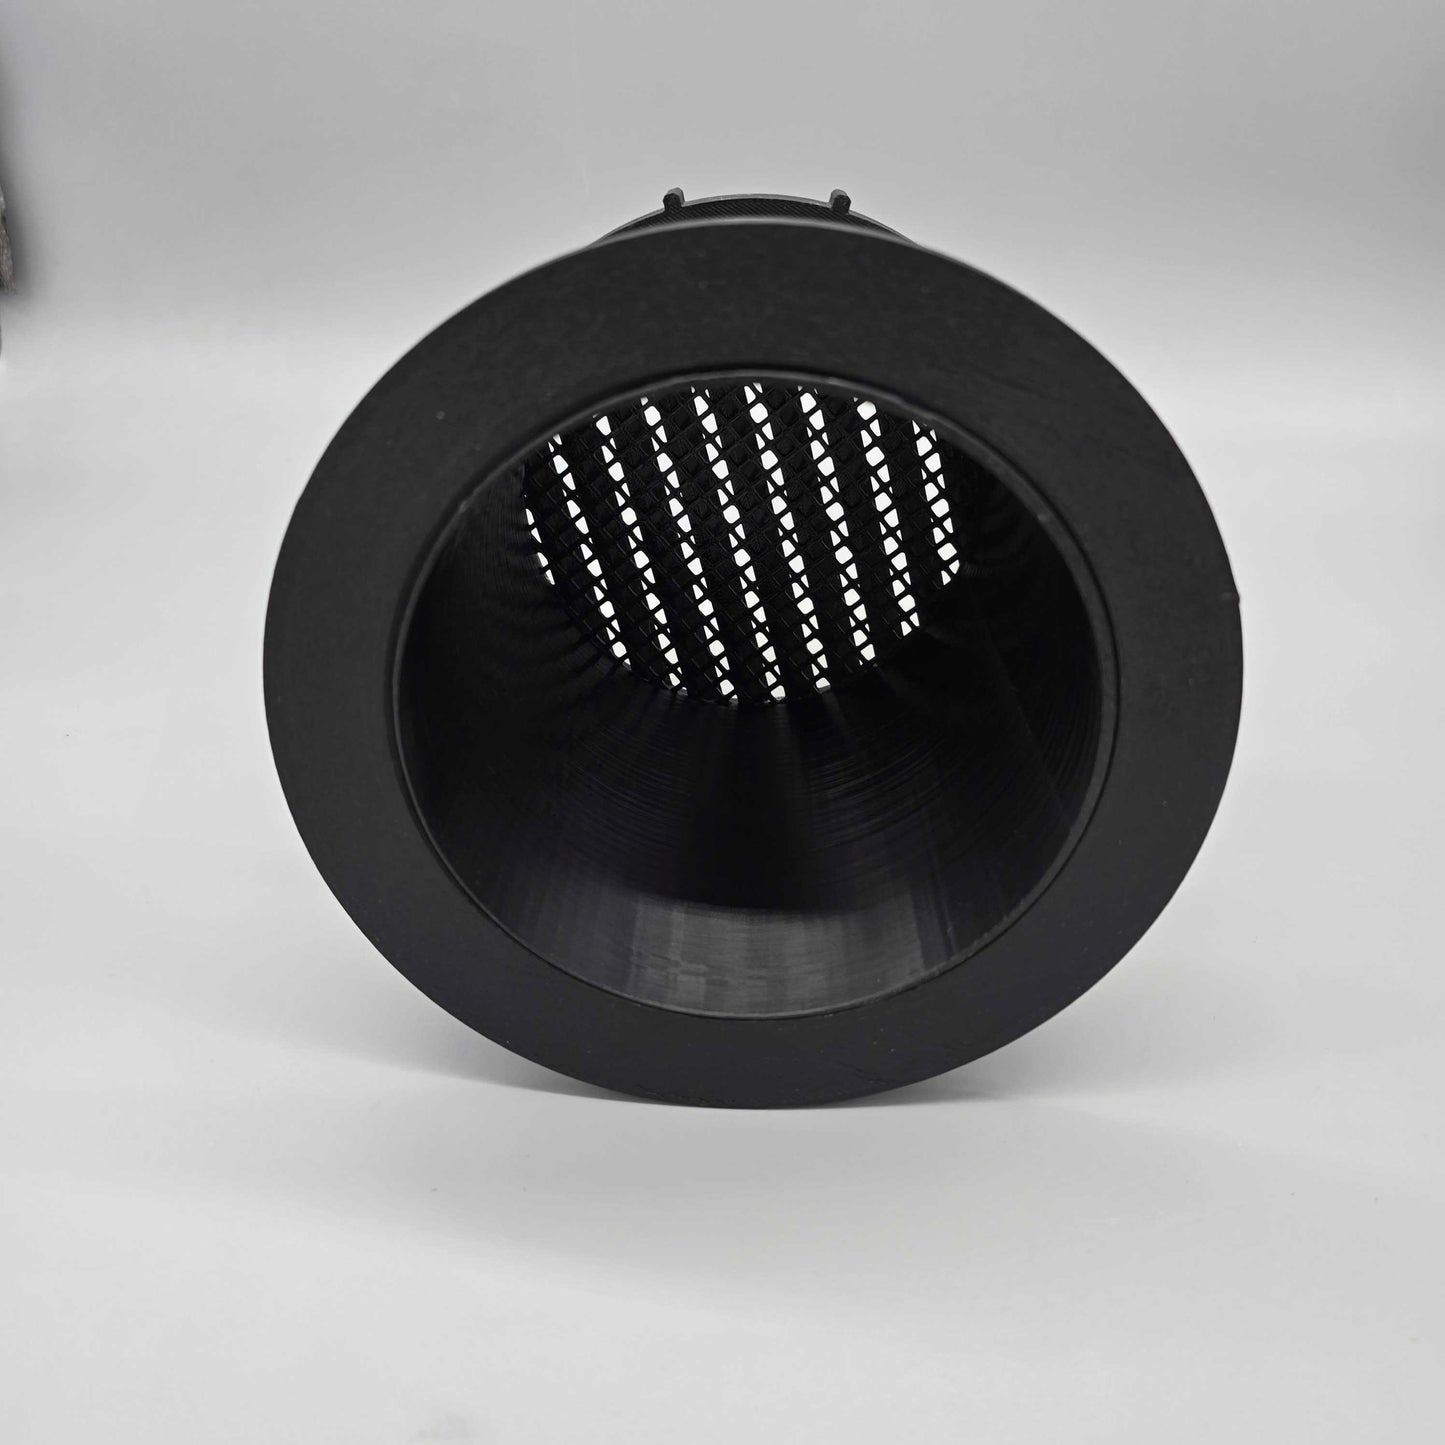
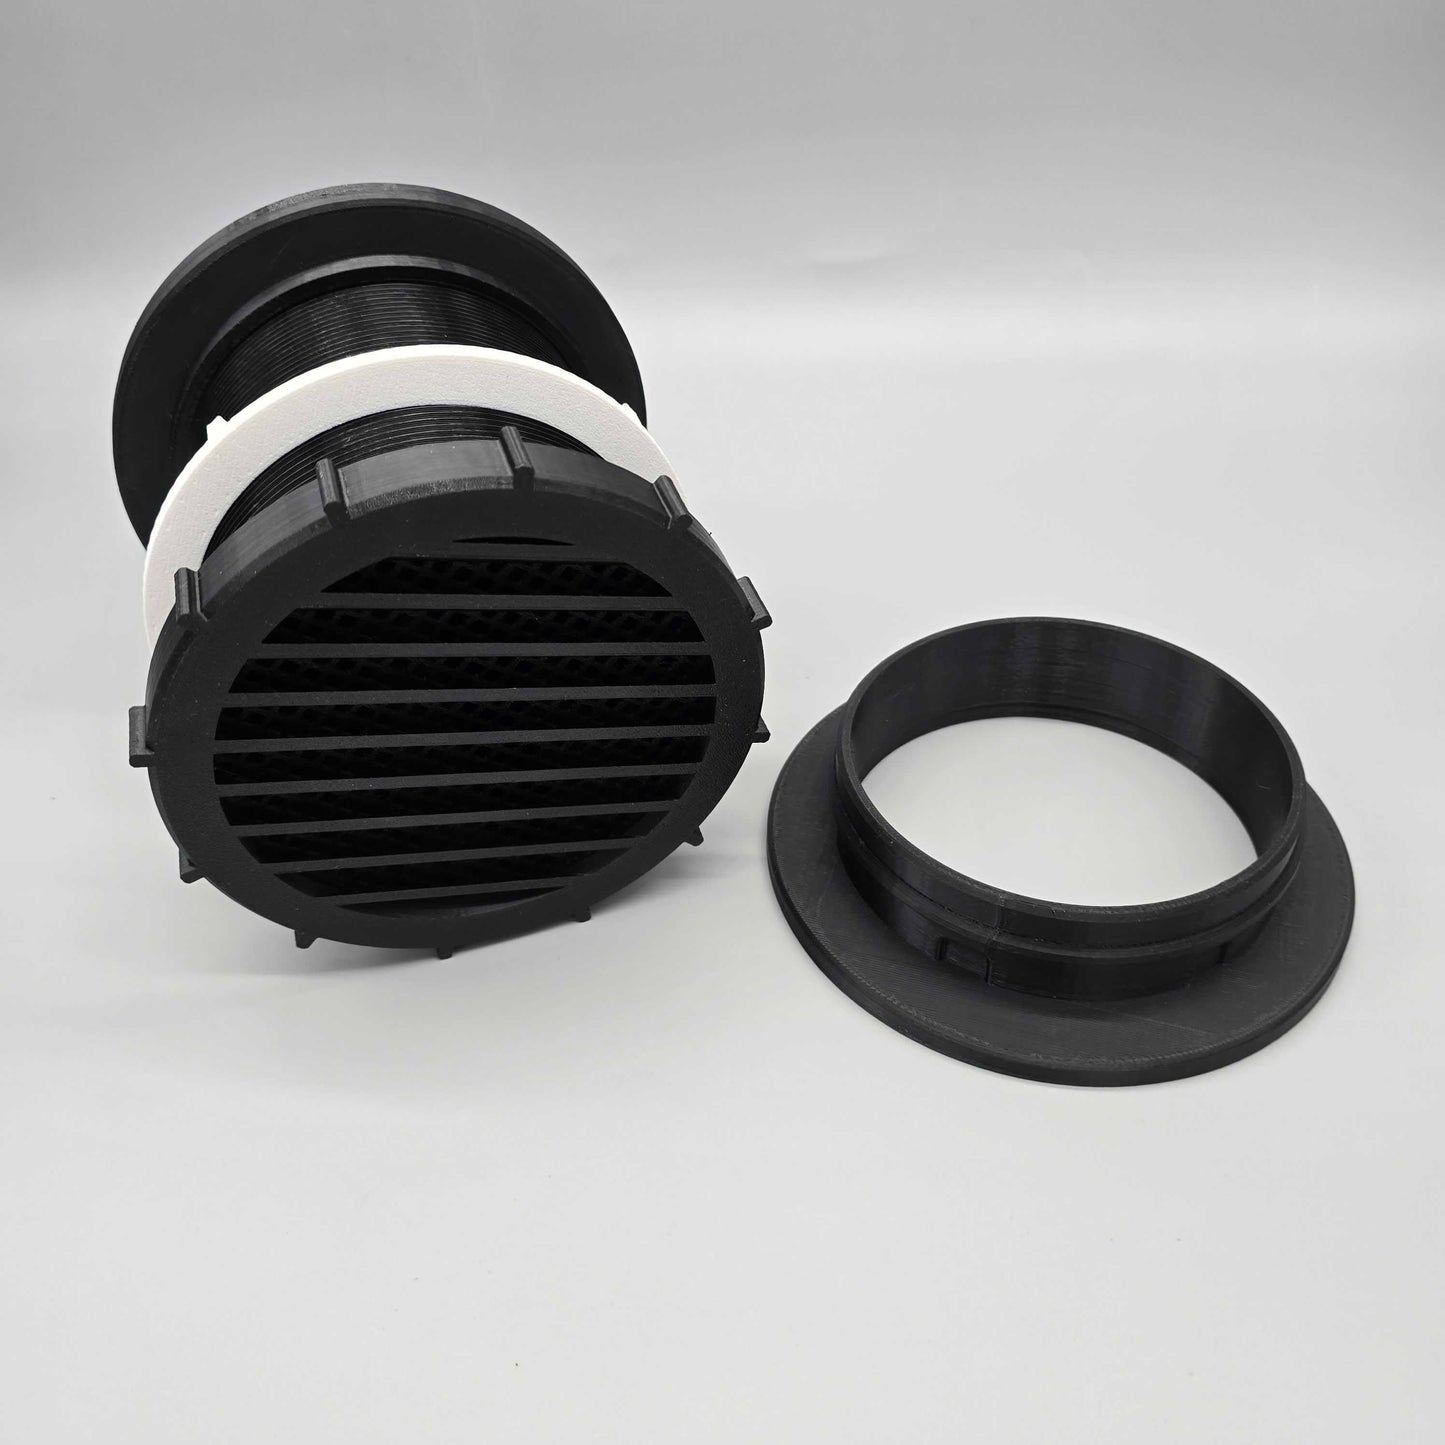
Our kit features external slanted vent slats that are engineered to effectively prevent rain ingress, safeguarding your interior from moisture. A built-in insect screen ensures that critters larger than 2mm are blocked, all while maintaining optimal airflow for peak AC performance.
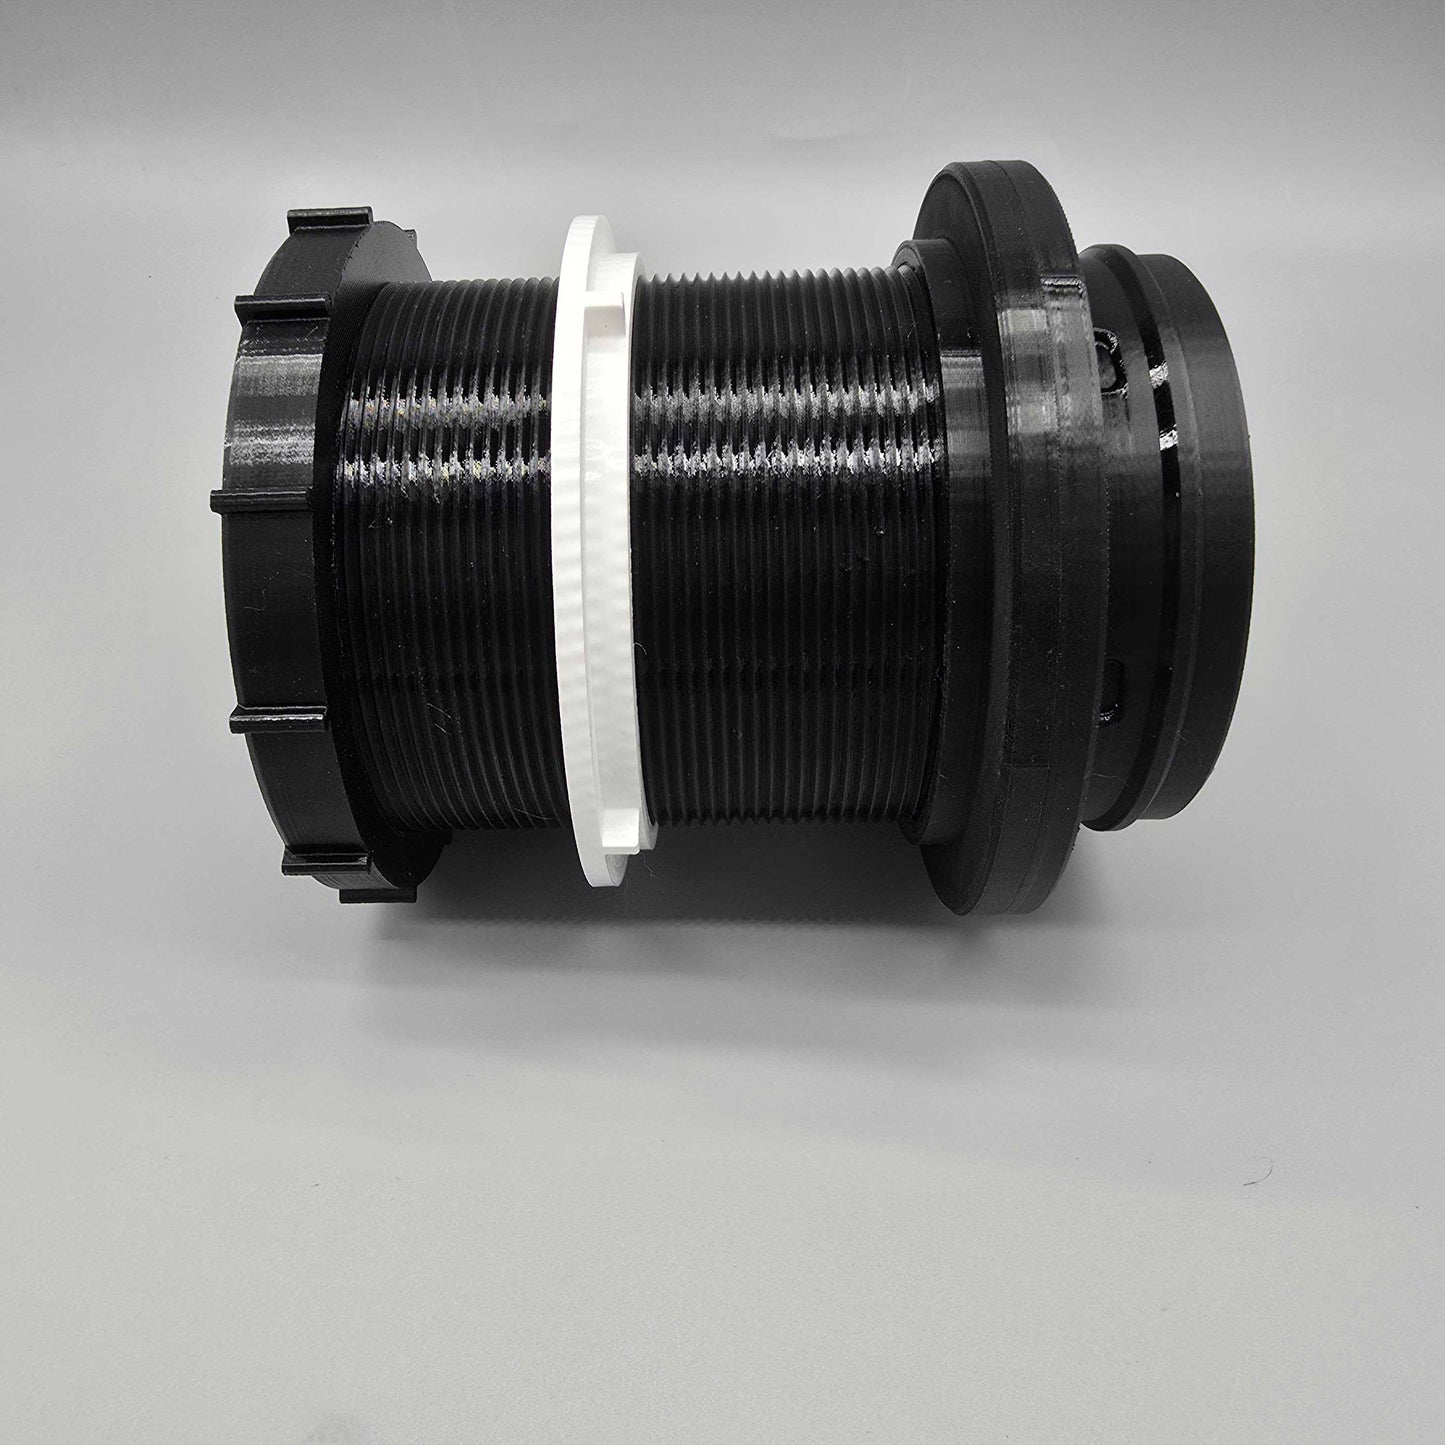
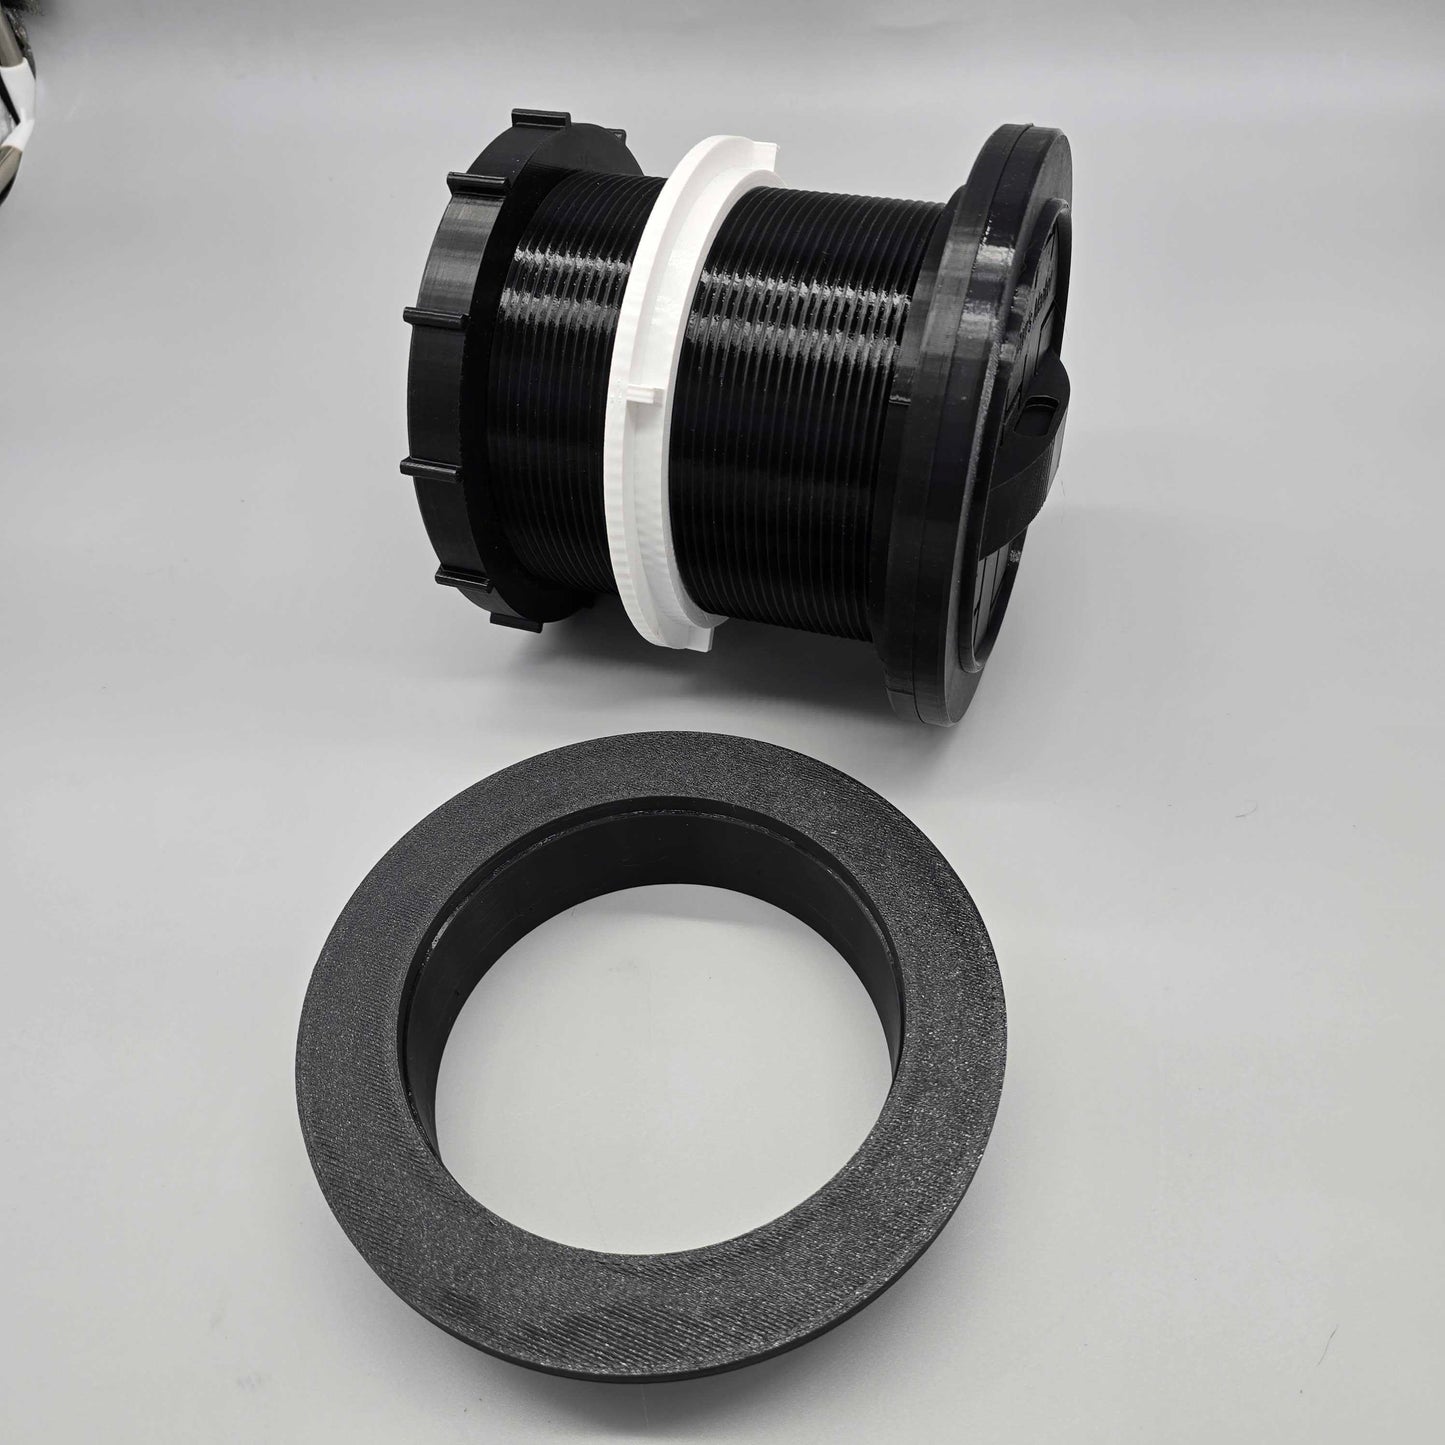
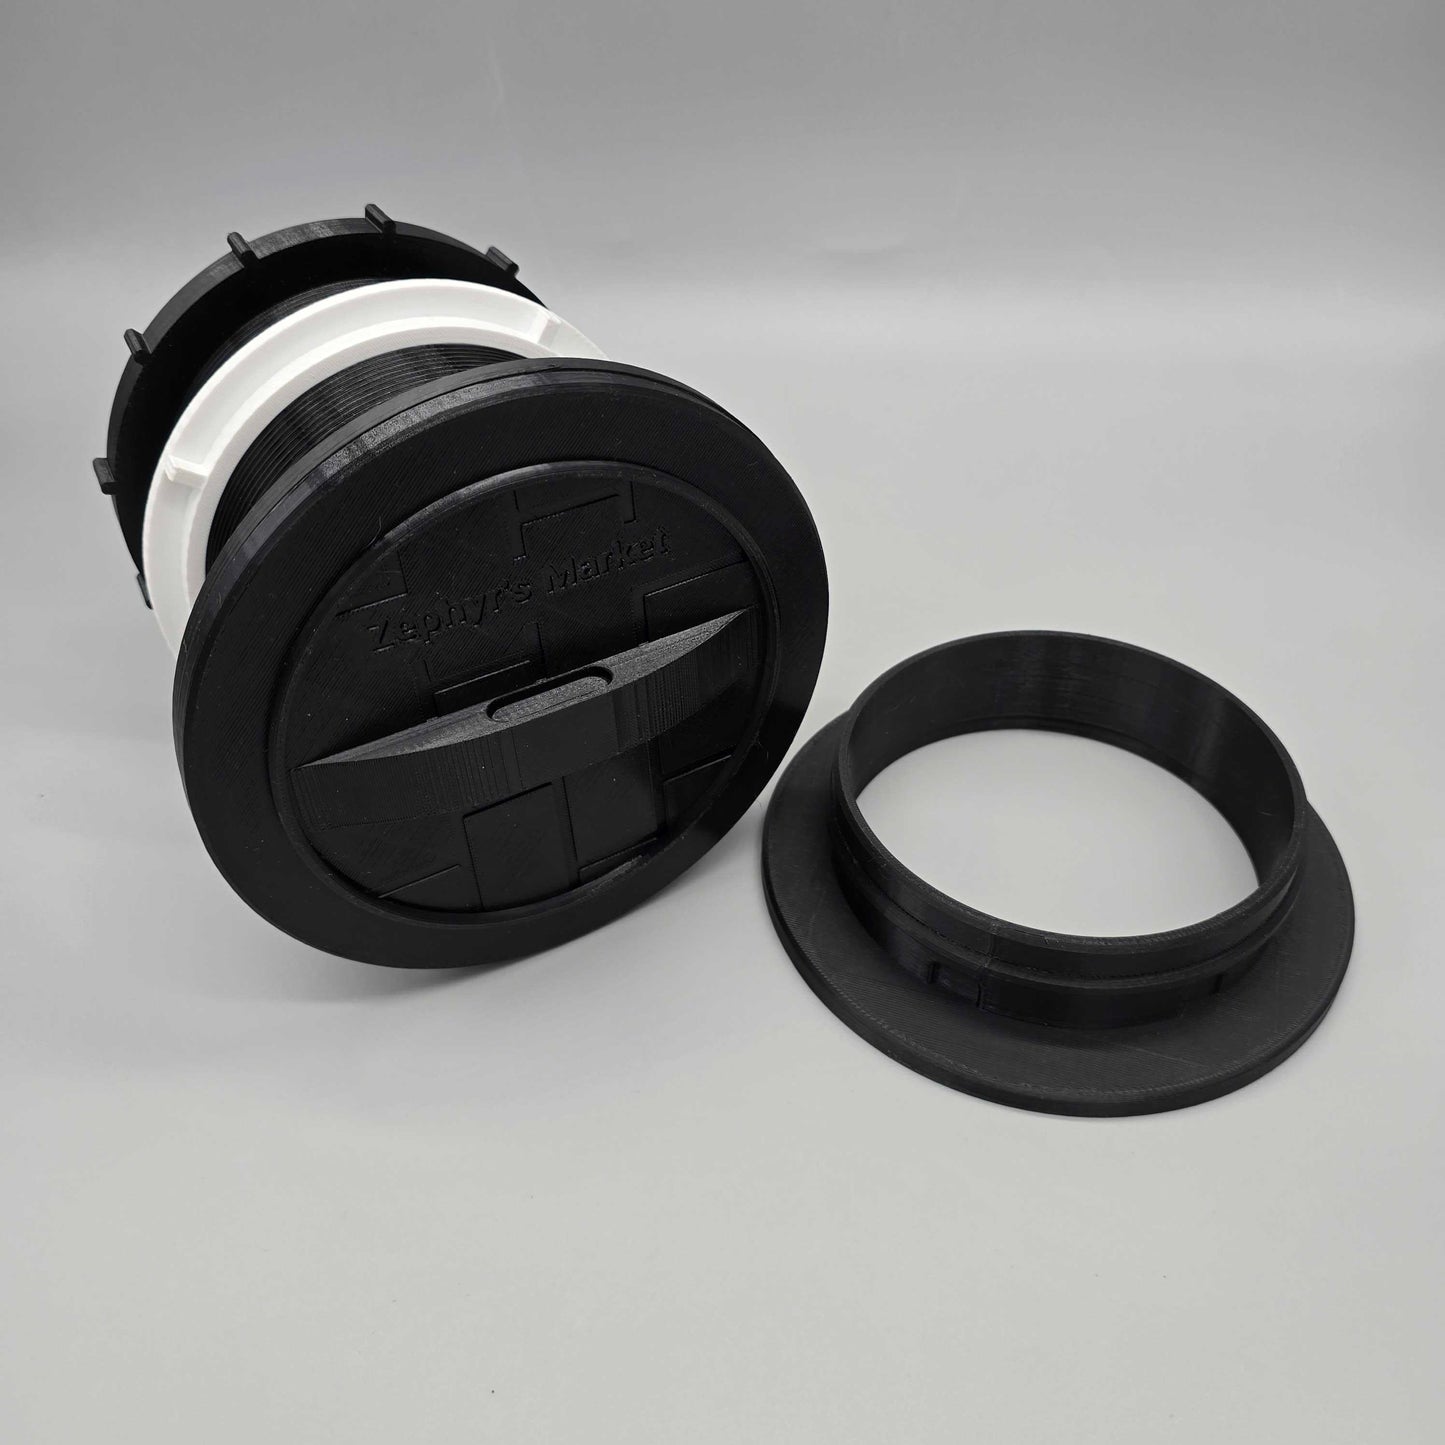
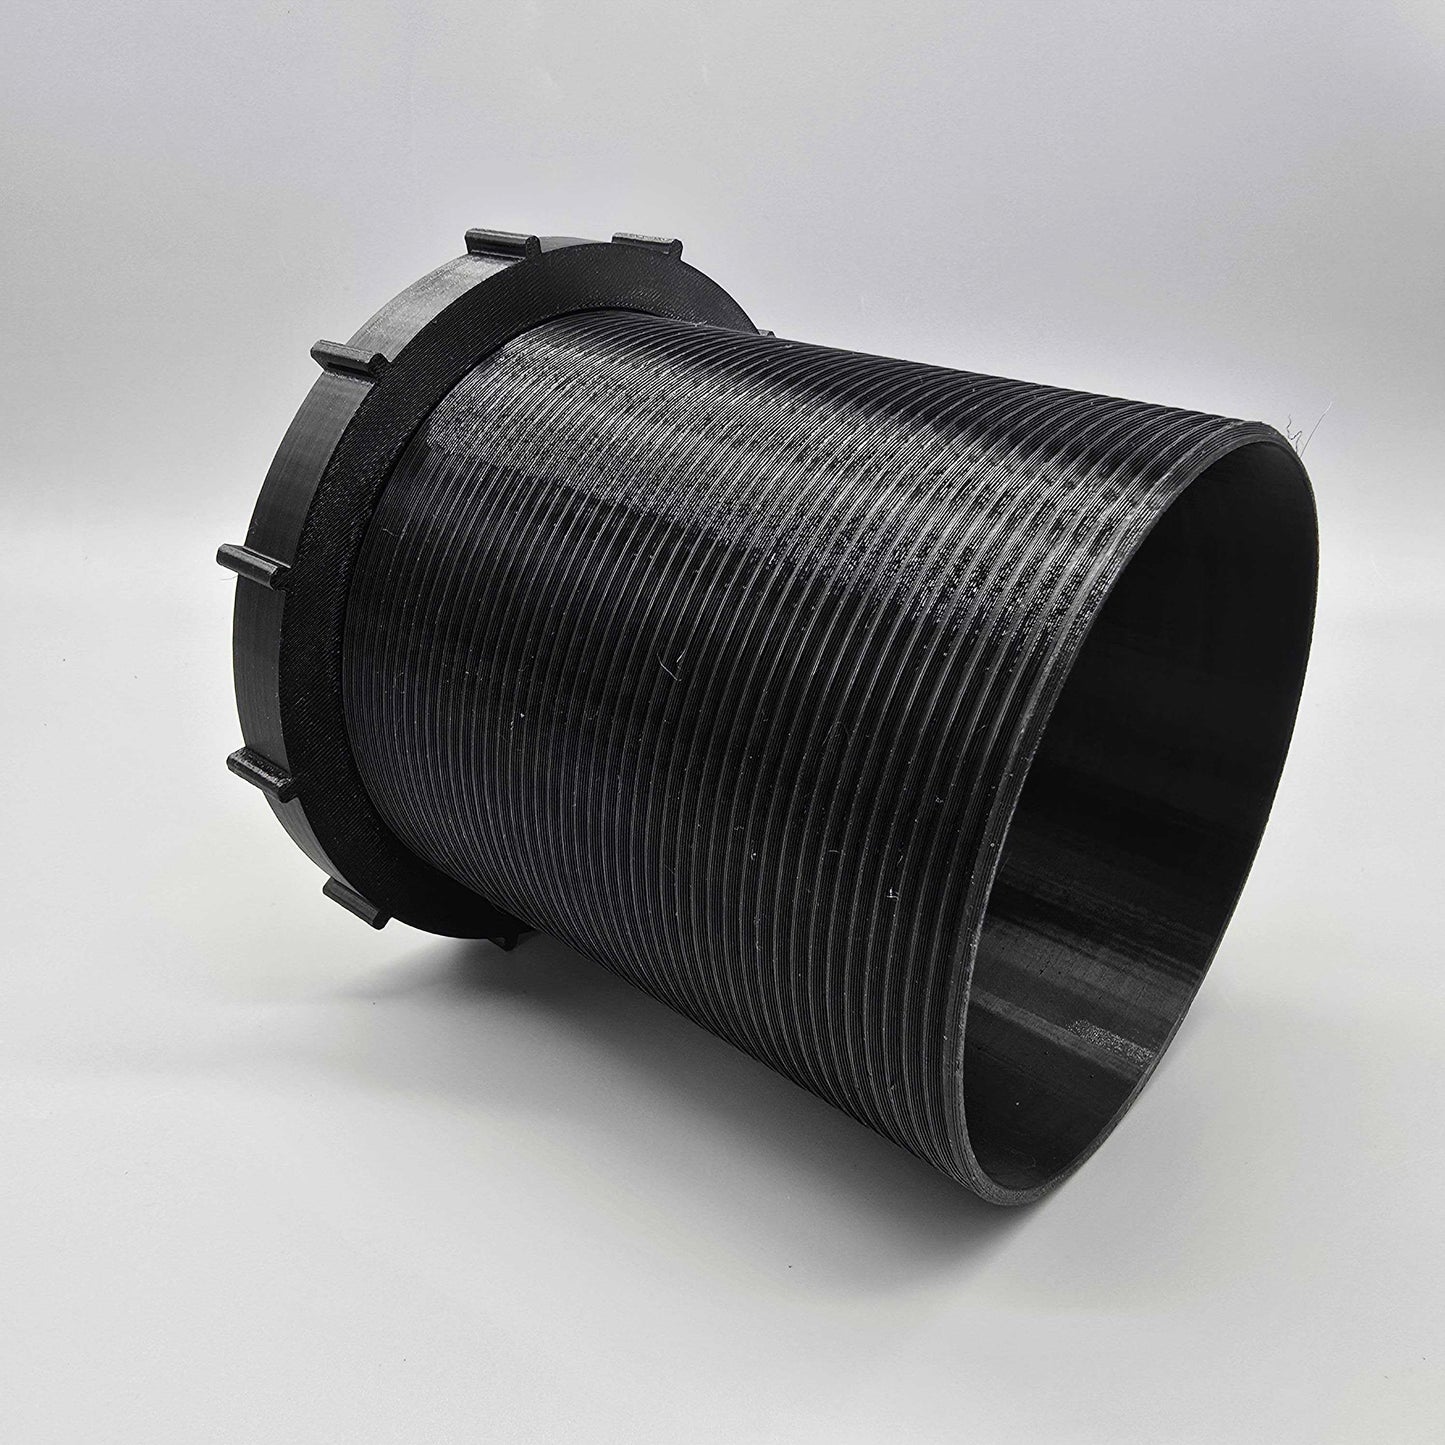
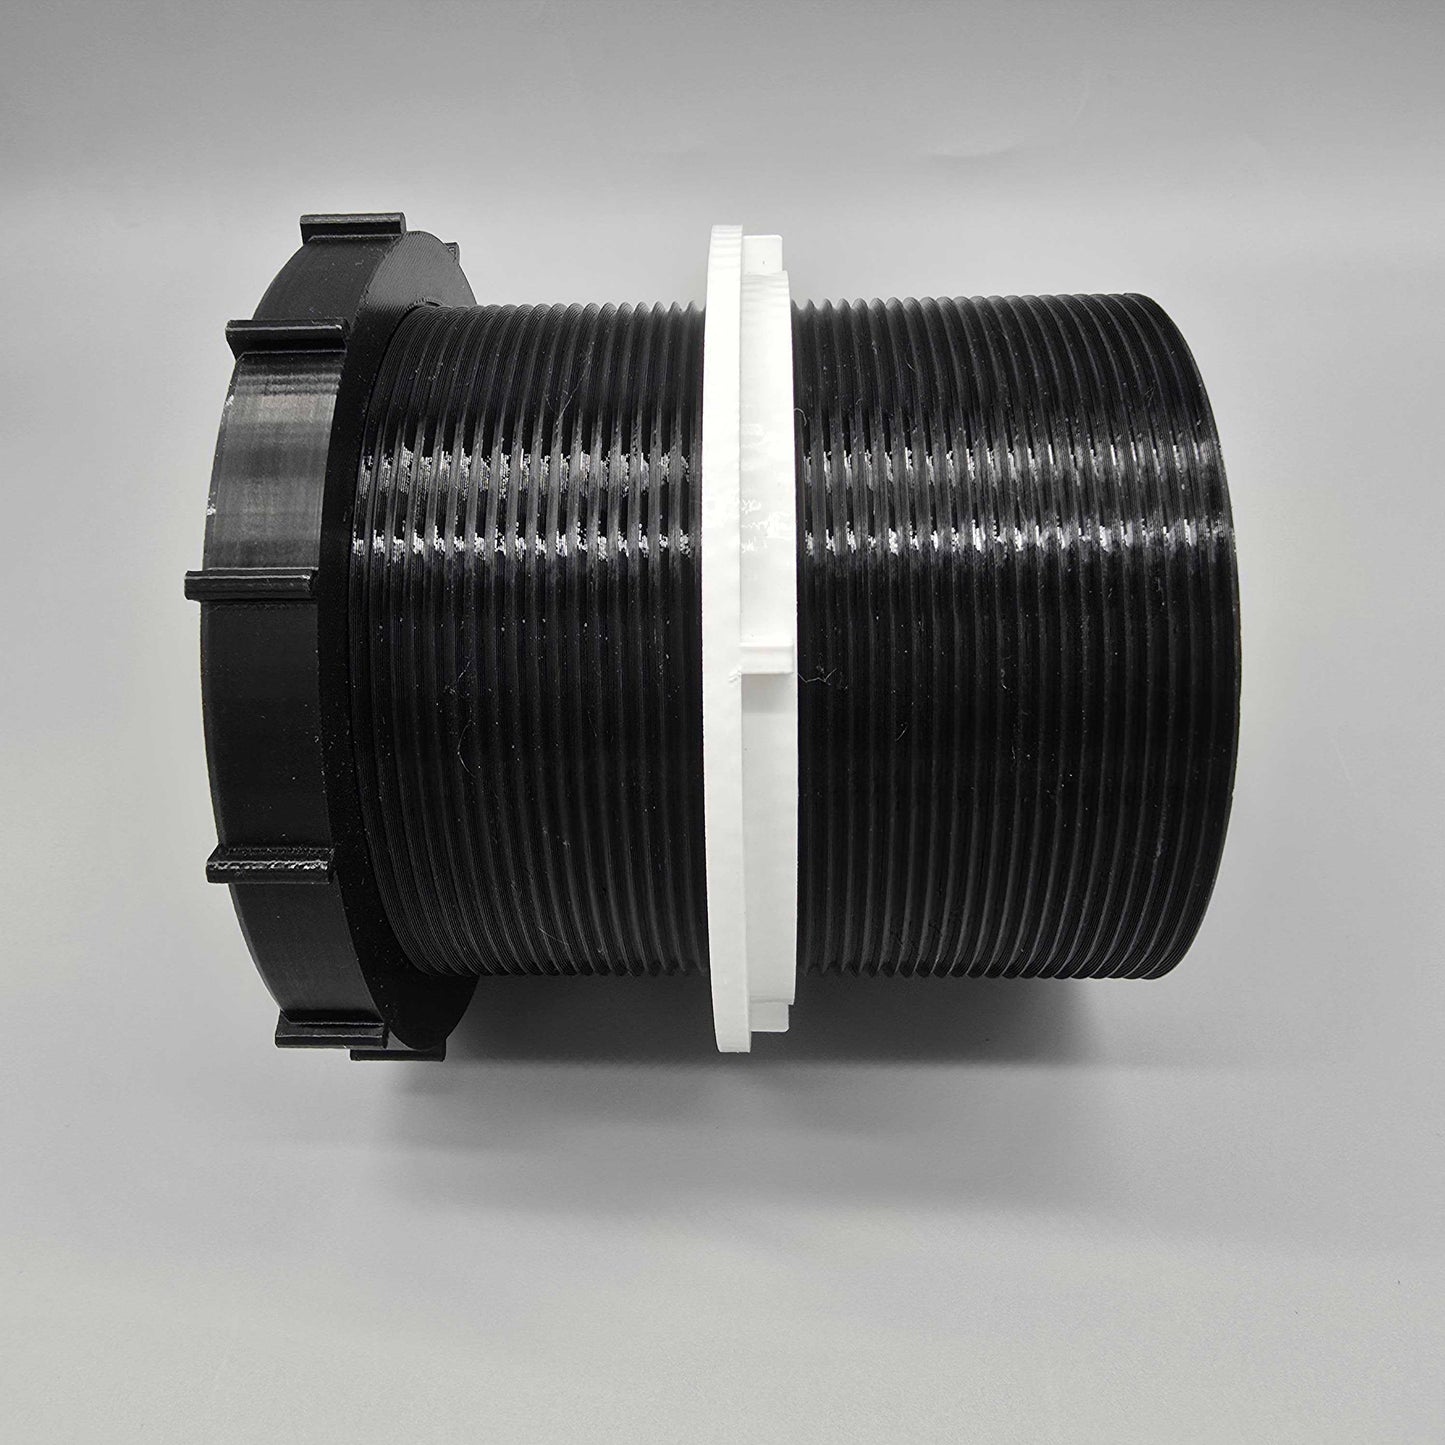
The heart of this kit is its magnetic tube attachment, allowing for the quickest and most secure connection or disconnection of your portable A/C unit's ducting. Say goodbye to struggling with clamps or tape! Plus, for off-season convenience, a magnetic cover is included to effectively seal the vent opening, ensuring durability and energy efficiency throughout the year.
Enjoy superior cooling, enhanced energy efficiency, and a clean installation without the hassle of permanent modifications or unsightly gaps. This kit is compatible with general 5-inch and 6-inch, as well as EcoFlow Wave ducting systems.
Key Features:
-
Versatile Application: Ideal for houses, RVs, motorhomes, and fifth wheels.
-
Easy, Screw-Free Installation: Simplifies setup without needing permanent mounting screws for the main unit.
-
Weather Protection: External slanted vent slats effectively prevent rain entry.
-
Integrated Insect Screen: Blocks pests larger than 2mm while maintaining airflow.
-
Magnetic Duct Attachment: Allows for quick, secure, and hassle-free connection/disconnection of AC ducting.
-
Off-Season Sealing: Includes a magnetic cover for effective sealing when the AC is not in use, boosting energy efficiency.
-
Durable Construction: Built for long-lasting performance in various conditions.
-
Wide Compatibility: Works with common 5-inch, 6-inch, and EcoFlow Wave portable AC ducting.
-
Improved Energy Efficiency: Reduces energy loss by creating a tight seal around the vent opening.
-
Clean Aesthetic: Provides a professional and integrated look compared to window venting.
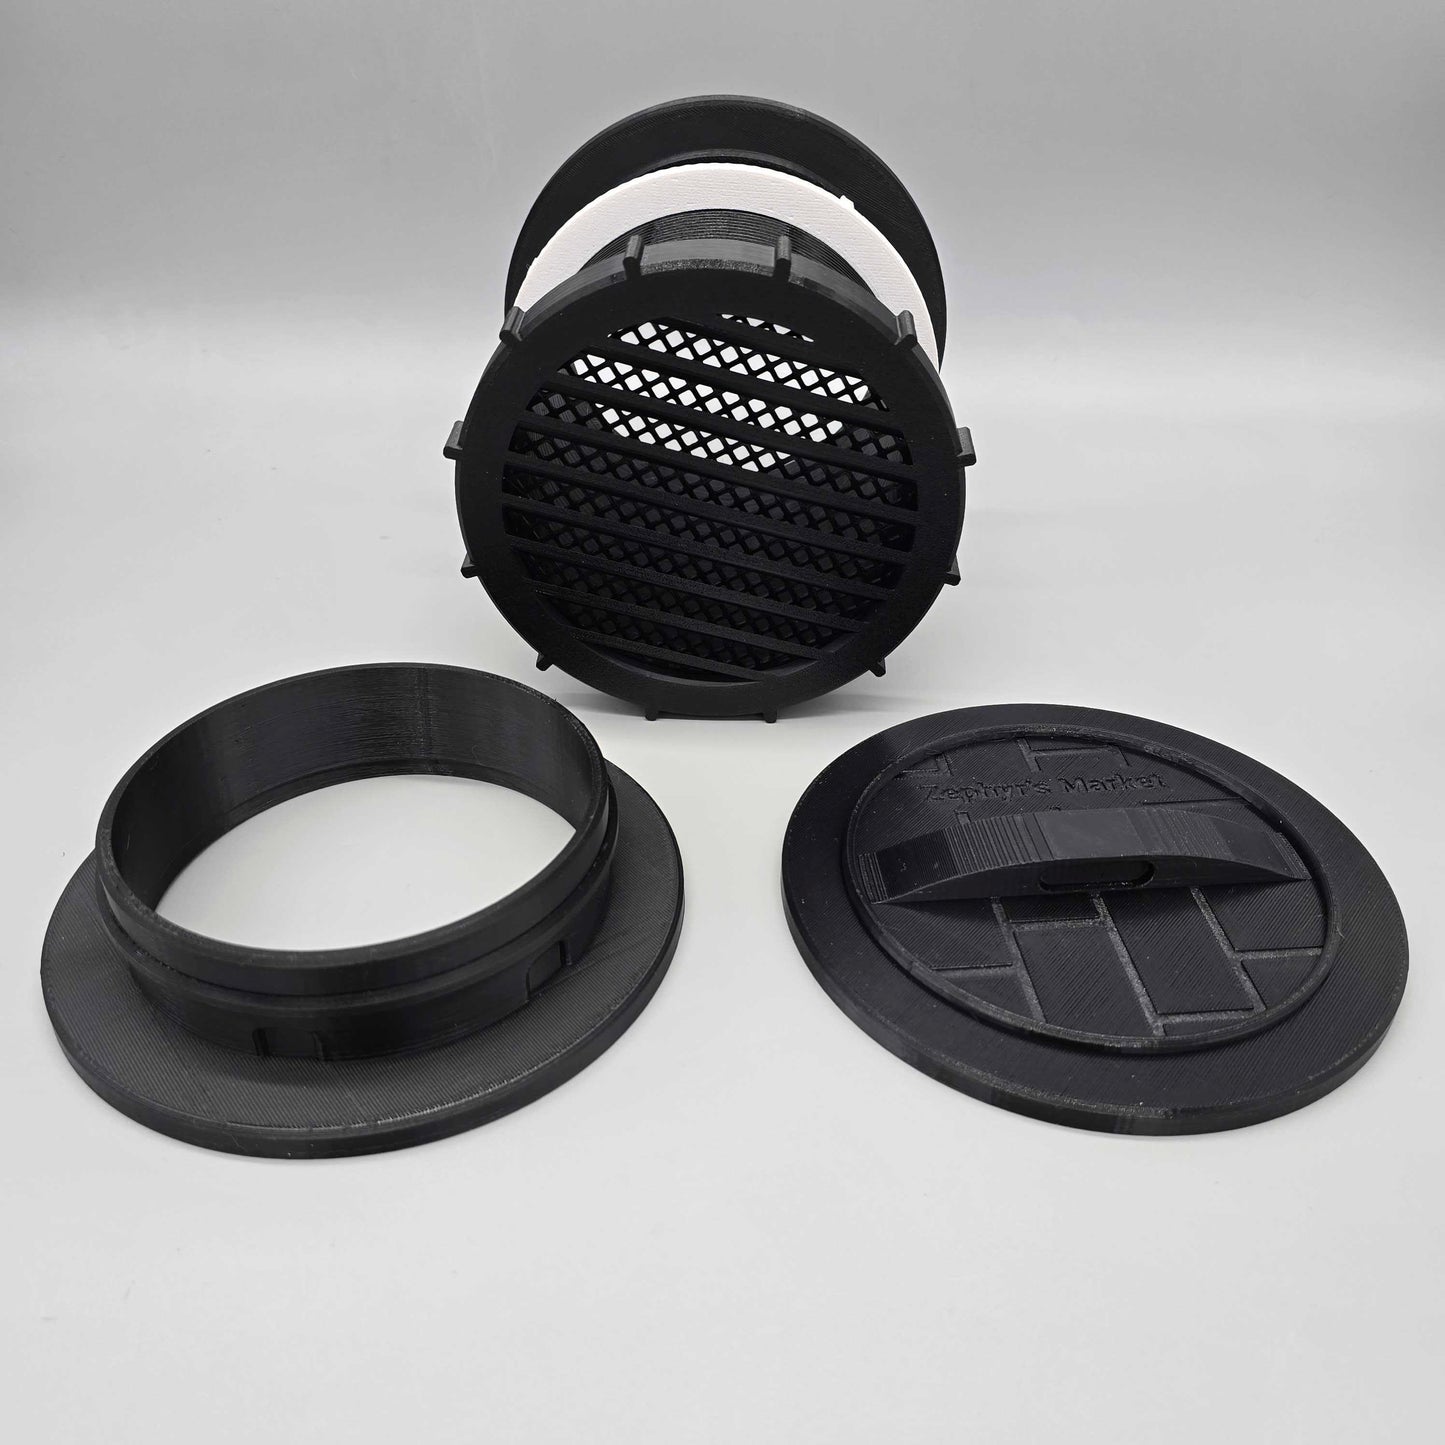
What's Included:
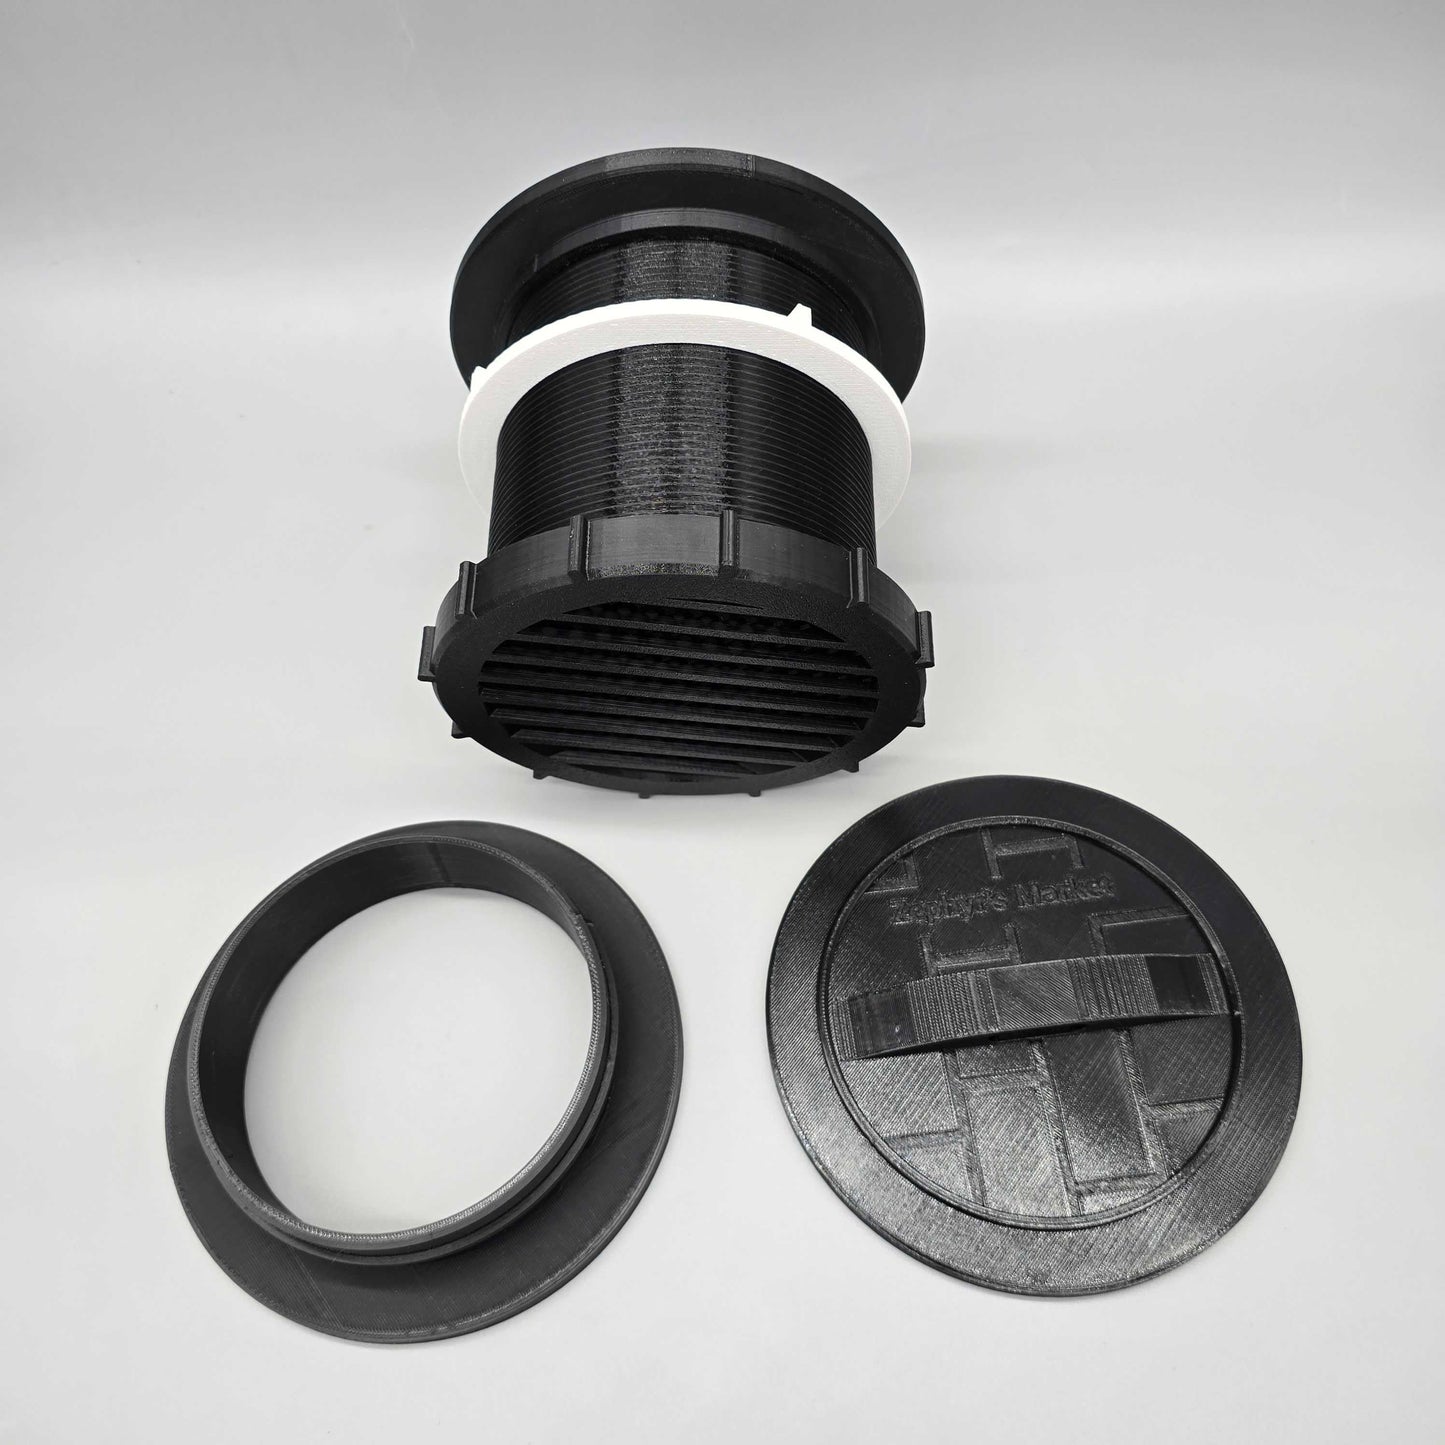
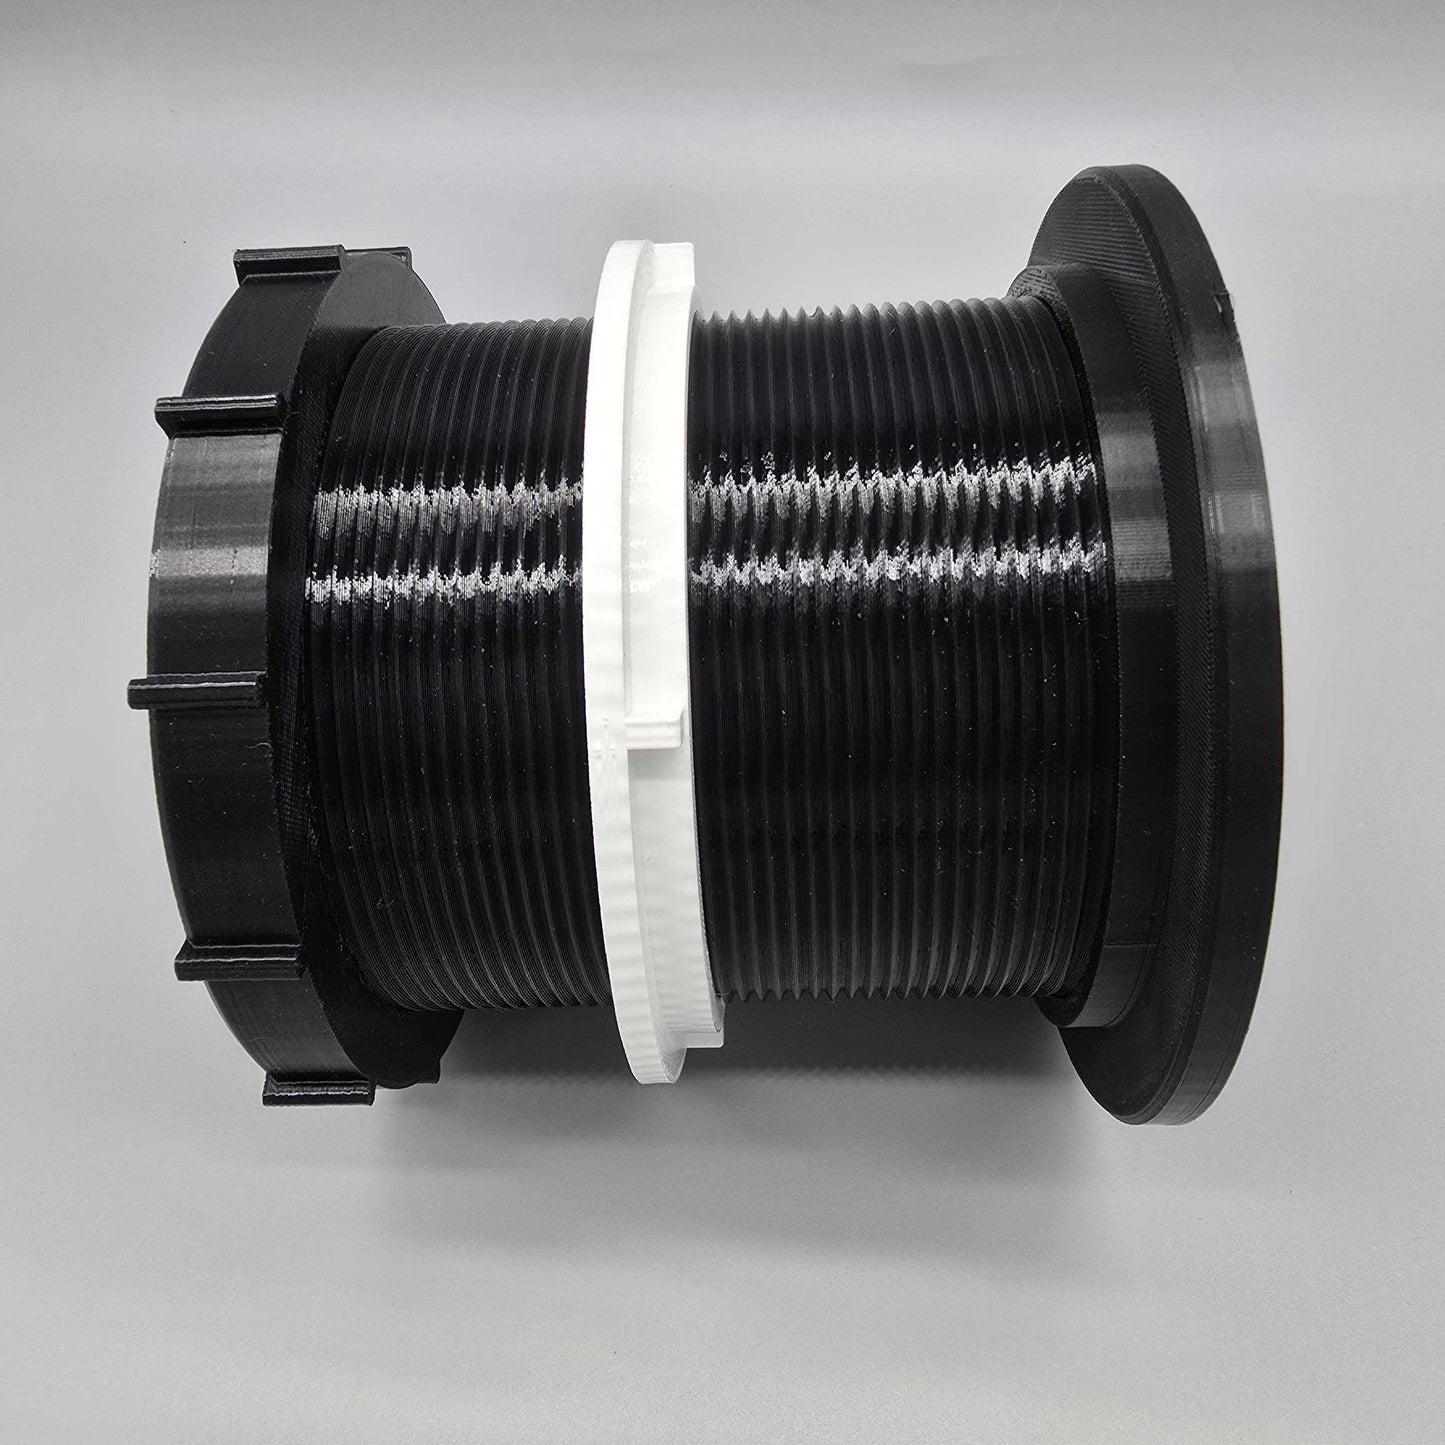
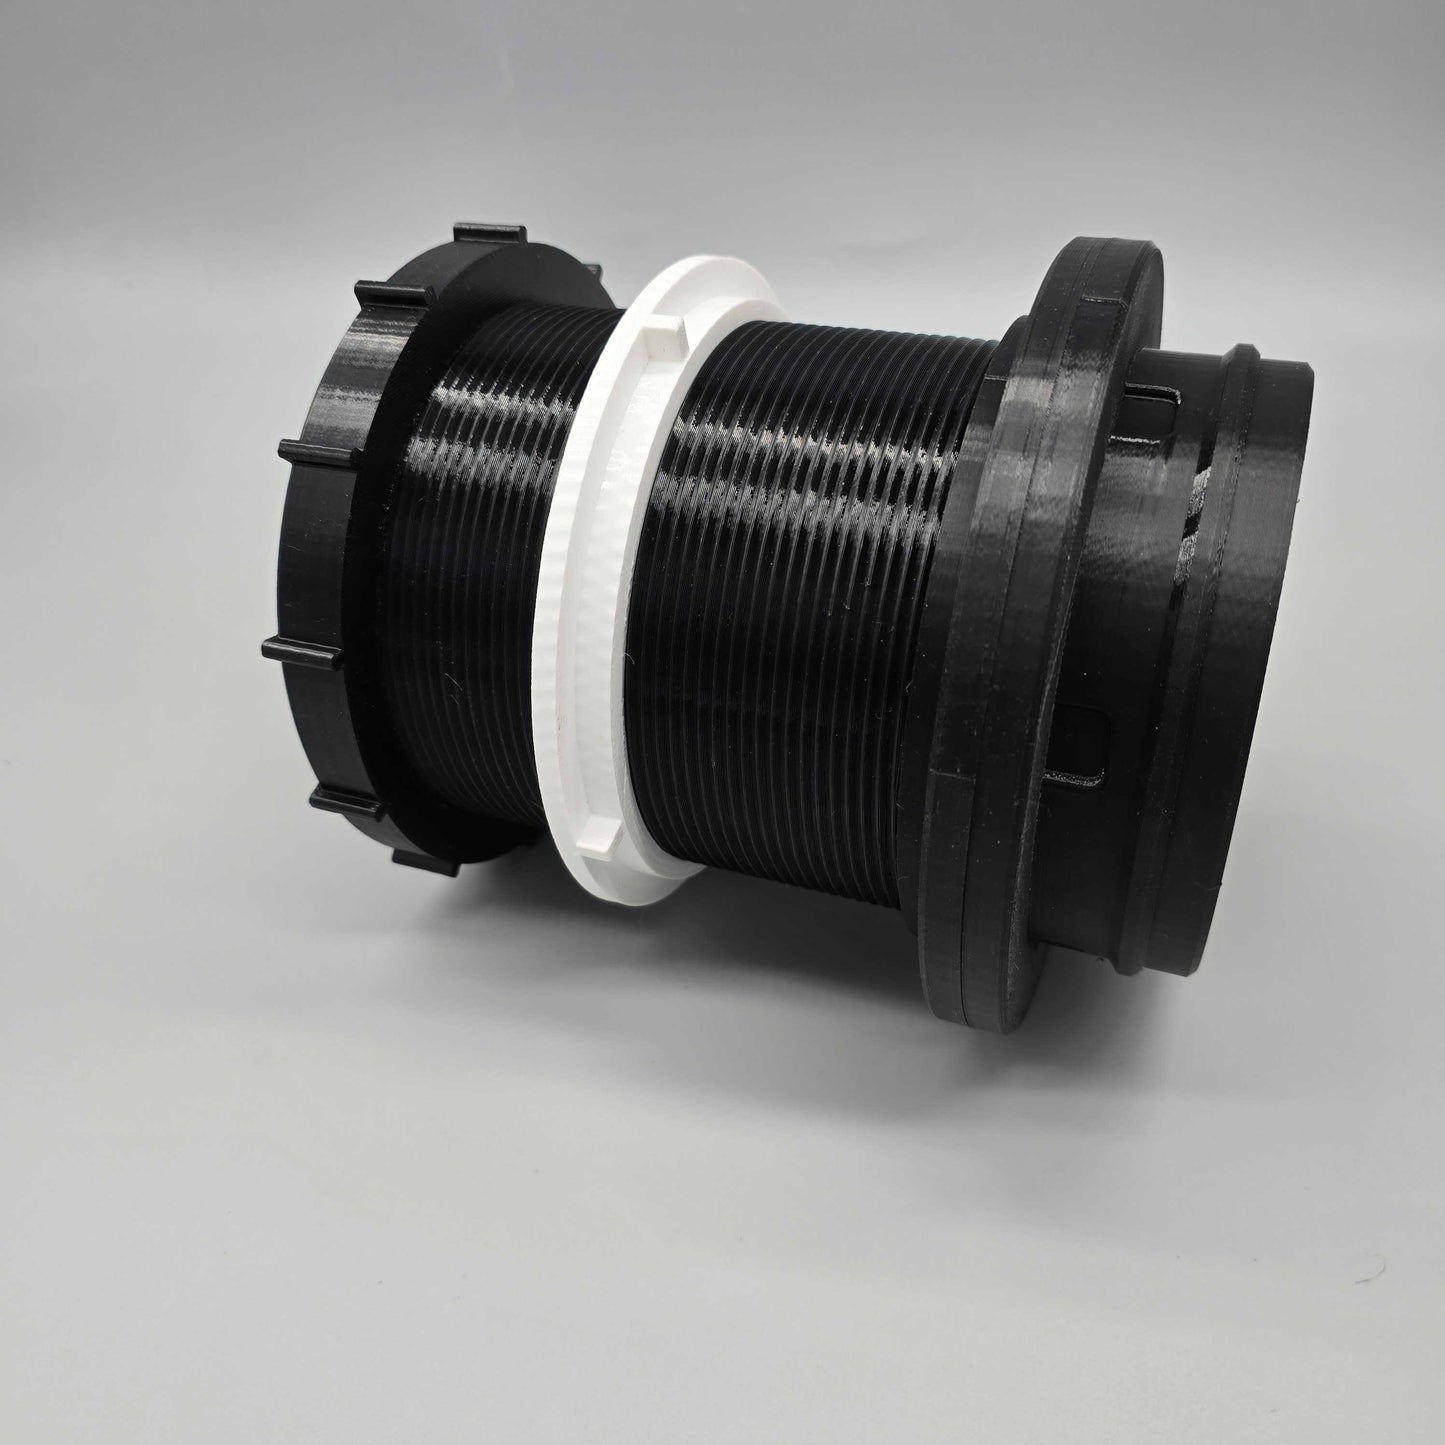
- 1x Through-Wall Vent Kit (Main Component with Slanted Slats & Insect Screen)
- 1x MagDuct Attachment (for AC Magnetic ducting connection)
- 1x MagDuct Off-Season Magnetic Cover
- (Mounting hardware like hole saws, caulk not included - refer to guide for tools needed)
How-To Guide: Installing Your Portable AC Through-Wall Vent Kit
This guide provides a general overview based on common installation practices. Always consult your specific portable AC manual and ensure safety when performing DIY projects.
Tools You Might Need:
- Stud Finder
- Hole Saw (appropriate sizes for 5-inch and 6-inch holes - typically 150mm and 165mm)
- Drill
- Circle Center Finder
- Caulking Gun
- Dicor Self-Leveling Sealant (for RVs) or exterior-grade caulk (for homes)
Installation Steps:
-
Preparation & Planning:
- Use a stud finder to identify areas free of electrical wires, plumbing, and internal framing within your wall. Ensure the chosen spot is large enough to accommodate the vent kit's diameter.
- Determine your wall thickness (e.g., by checking through an open window frame) to ensure it's compatible with the vent kit's depth.
-
Marking the Cut:
- Use the vent kit itself as a template to draw precise circles for your holes on the interior wall.
- Use a circle center finder to mark the exact center of each circle.
-
Making the Cut:
- From inside your house/RV, begin drilling with the appropriate hole saw. Drill slowly and steadily until the pilot drill bit breaks through to the exterior.
- Move to the outside of your wall. Align the hole saw with the pilot hole you just created and complete the cut from the exterior side. This helps prevent splintering or damage to the exterior finish.
-
Vent Kit Installation:
- This step is easiest with two people. One person inserts the main component of the vent kit from the exterior side.
- The second person, from the interior, secures the locking ring onto the vent kit, tightening it until the unit is firmly clamped in place within the wall. No screws are needed for this primary attachment.
-
Sealing (Crucial!):
- Apply a generous bead of high-quality exterior-grade caulk (like OSI Quad Max, SikaFlex, or Dicor) around the outer flange of the vent kit where it meets the exterior wall. This prevents any water seepage and ensures a weather-tight seal.
-
Connecting Your AC:
- Your portable air conditioner's exhaust tube can now be quickly and securely connected to the magnetic attachment point on the vent kit.
-
Off-Season Use:
- When your portable AC is not in use (e.g., during winter), attach the included magnetic cover over the exterior vent opening to seal it off effectively, providing insulation and keeping out pests.
Important Safety Note: Always exercise extreme caution when cutting into walls to avoid hitting wires, pipes, or structural elements. If you are unsure, consult a professional. Exercise caution when closing windows or doors near the adapter to avoid damage.